Thai Coconut Sweet Rice with Mango (No-Soak Recipe)
on Nov 23, 2023
This is a much FASTER and EASIER version of everybody’s favorite mango sticky rice! The trick is to use a rice cooker rather than a stove. The sweet rice comes out perfectly sticky with a nice chewy texture, just like you get at Thai restaurants. Mix it with the sweet and slightly salty coconut sauce, and serve it with mango for an incredible dessert. It’s ready in under an hour, no soaking required! Totally a game-changer!
The long soaking process required for making sticky rice deterred me from making it for years, but finally, I’ve cracked it! Cooking the sticky rice in the rice cooker has now become my favorite way to cook this grain. It’s so much faster than the traditional method as my recipe doesn’t require soaking the rice for hours, but it still yields a perfectly sticky and gooey texture!
This mango coconut sticky rice recipe is even better than you get at Thai restaurants.
Yup, I said it. Mango sticky rice is sweet, sticky, and slightly chewy, flavored with delicious coconut sauce. This recipe couldn’t be easier or more delicious. You (and your kids) will ❤️ it! It’s also gluten-free and vegan.
Bonus: You can adjust the sweetness level for your family by making it at home!
Watch Thai Sweet Rice Recipe Video
Ingredients in mango sticky rice
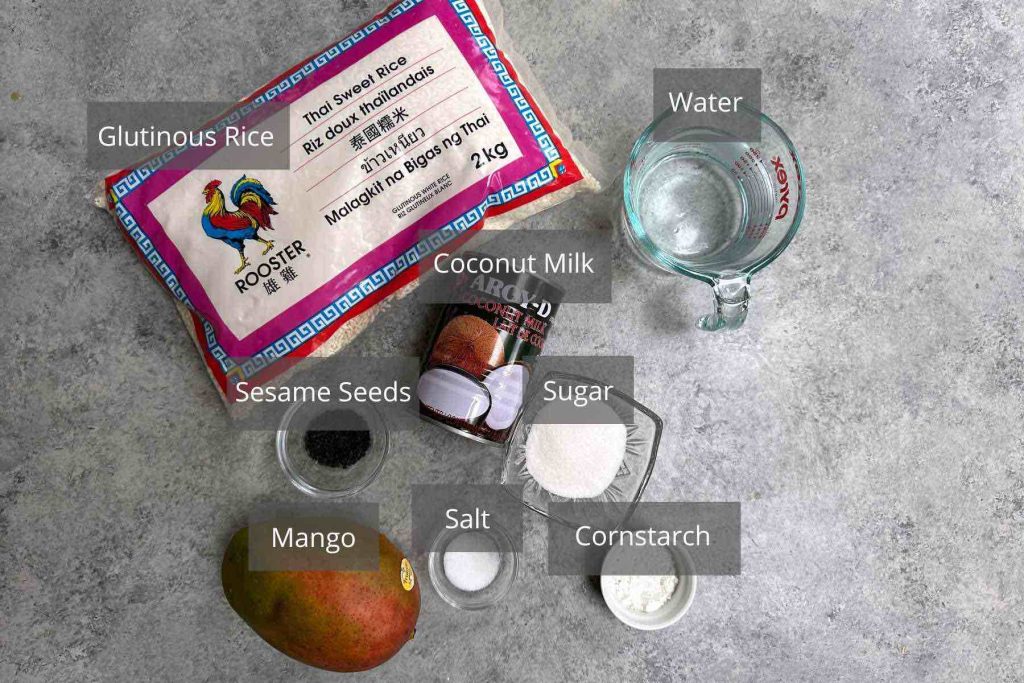
- Sticky rice, of course! Use the right sticky rice (glutinous rice or sweet rice). Black sticky rice works as well.
- Water – The right rice-to-water ratio is the secret to the perfect texture of your sticky rice. As this is a no-soaking method, we’ll need slightly more water than the traditional method. I’ve tested different ratios, and my favorite is 1 cup of rice to 1 and 1/4 cups of water.
- Coconut milk – Full-fat coconut milk gives you the best flavor. You can also use coconut cream, and you’ll need to exclude cornstarch as your sauce will be thick enough.
- Sugar – Omit sugar if you use sweetened coconut milk.
- Salt: It helps to balance out the sweetness of the rice.
- Cornstarch – It helps to thicken the sauce.
- Mango – Look for fragrant and ripe mangoes that are slightly soft to touch.
Choose the Right Sticky Rice
When buying sticky rice for this recipe, make sure the package is labeled “glutinous rice” or “sweet rice”. You can find it at Asian grocery stores and most of your everyday supermarket. You can also order it online.
⚠️ Note: Sushi rice is NOT the right one to use for this recipe!
Make the easiest mango sticky rice – in just 3 simple steps!
Cook the rice, make the sauce, and mix them together. That’s it. We’ll skip the long process of soaking the rice, but no compromise on texture or flavor!
The secret to no-soak sticky rice – cook it in a RICE COOKER
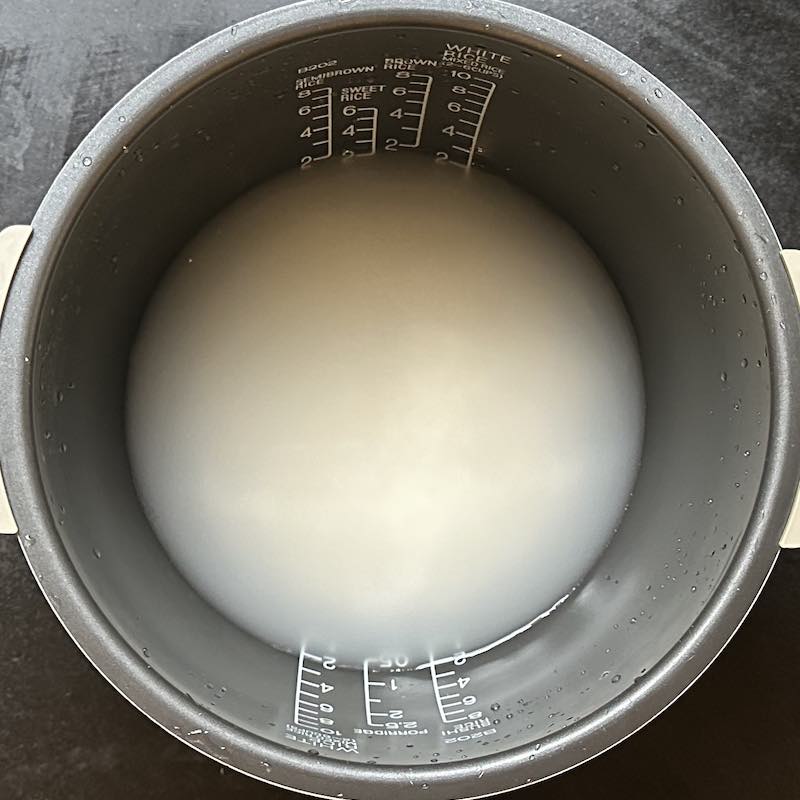
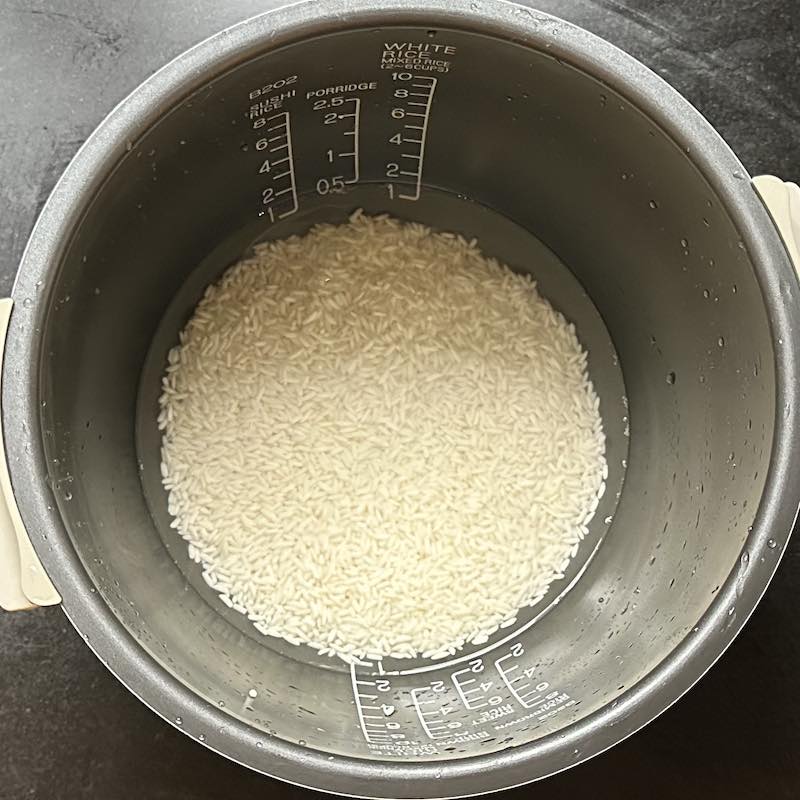
I used my Zojirushi rice cooker for this recipe. Rinse the sticky rice in the rice cooker pot under cold running water until the water becomes cloudy. Drain the water completely. Then add 1 and 1/4 cups of water to the pot.
Place the pot in the rice cooker, and select the “Sweet” function if your rice cooker has this setting, otherwise, cook it as you normally do with jasmine rice. Tip: Rinse the rice before cooking to remove excess starch from the outside of the grains.
Make coconut sauce
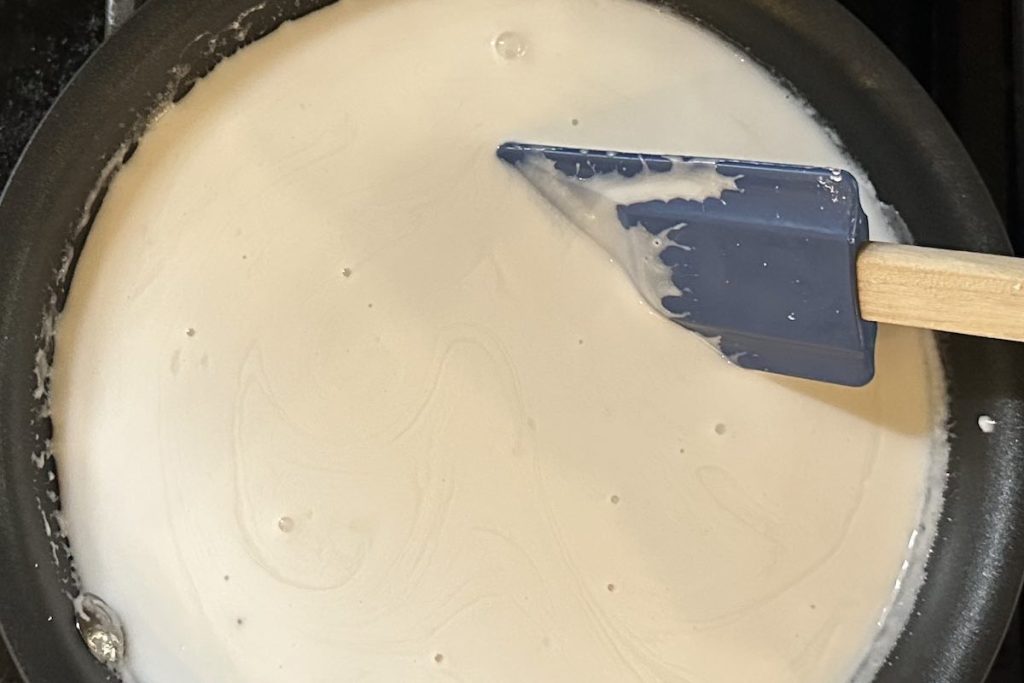
When the rice is cooking, you can make the sauce. Combine coconut milk, sugar, and salt in a skillet over medium-low heat. Cook for 3-4 minutes or until the mixture is hot. Thicken the sauce with the cornstarch and water mixture.
Consistency troubleshooting: For this recipe, the sauce doesn’t need to be too thick. The level of sweetness is more important. I like it to be slightly runny and it’s not overly sweet. To prevent the coconut milk from separating, AVOID boiling the mixture. You can always add more water if your sauce is too thick.
Mix the rice with the sauce
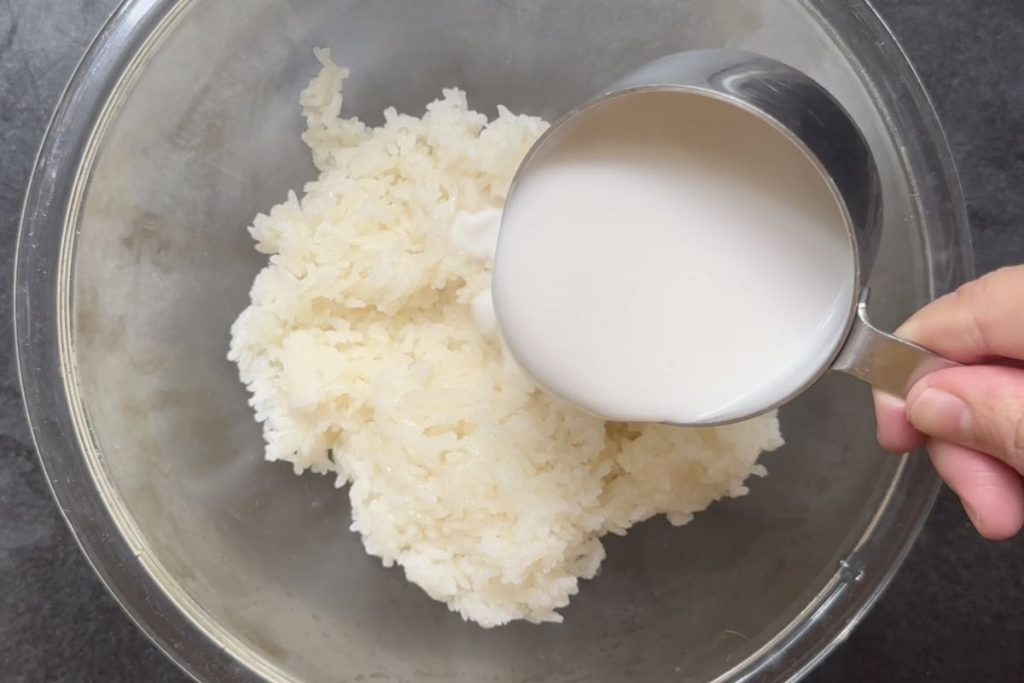
Start by adding 1/2 cup of the coconut sauce to the cooked sticky rice. Mix and taste. Add more sauce until it reaches your desired sweetness. Tip: Add the sauce GRADUALLY as you don’t want your sticky rice TOO sweet!
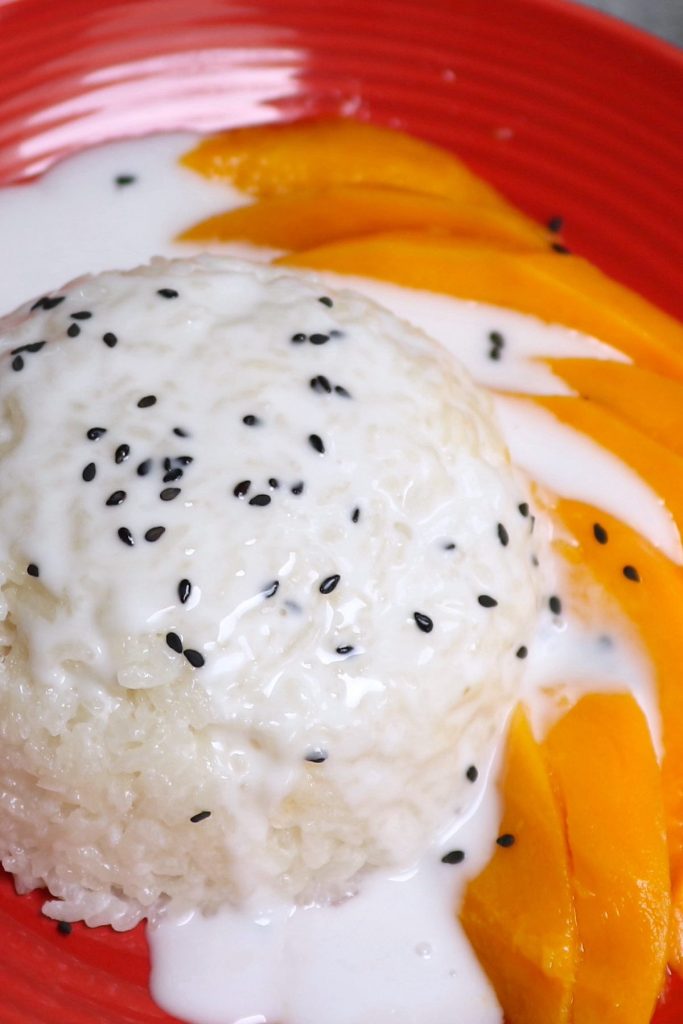
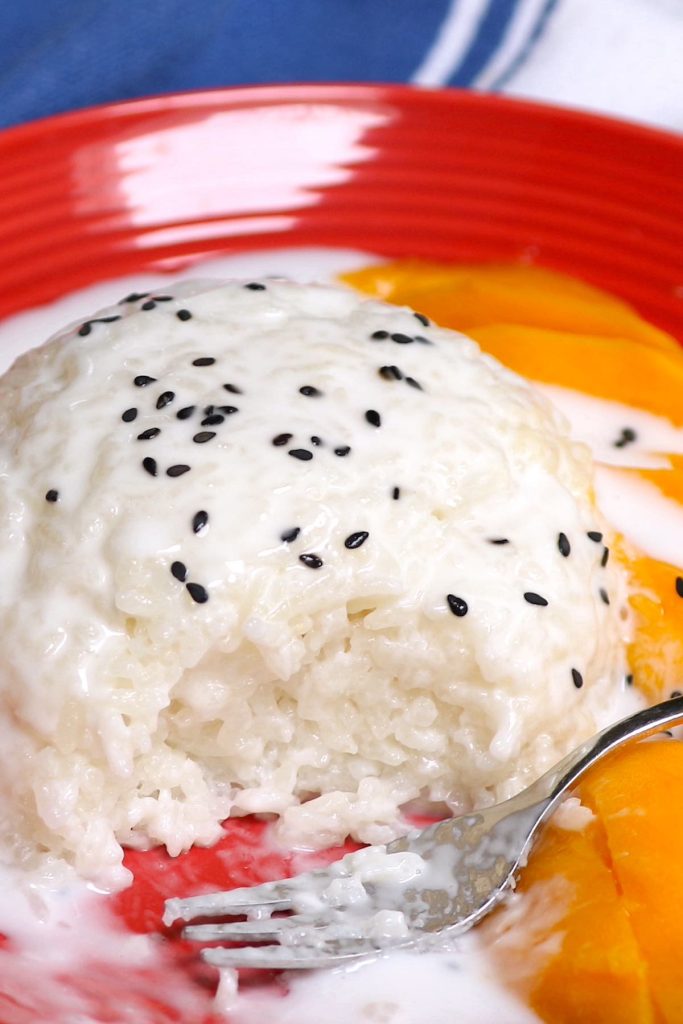
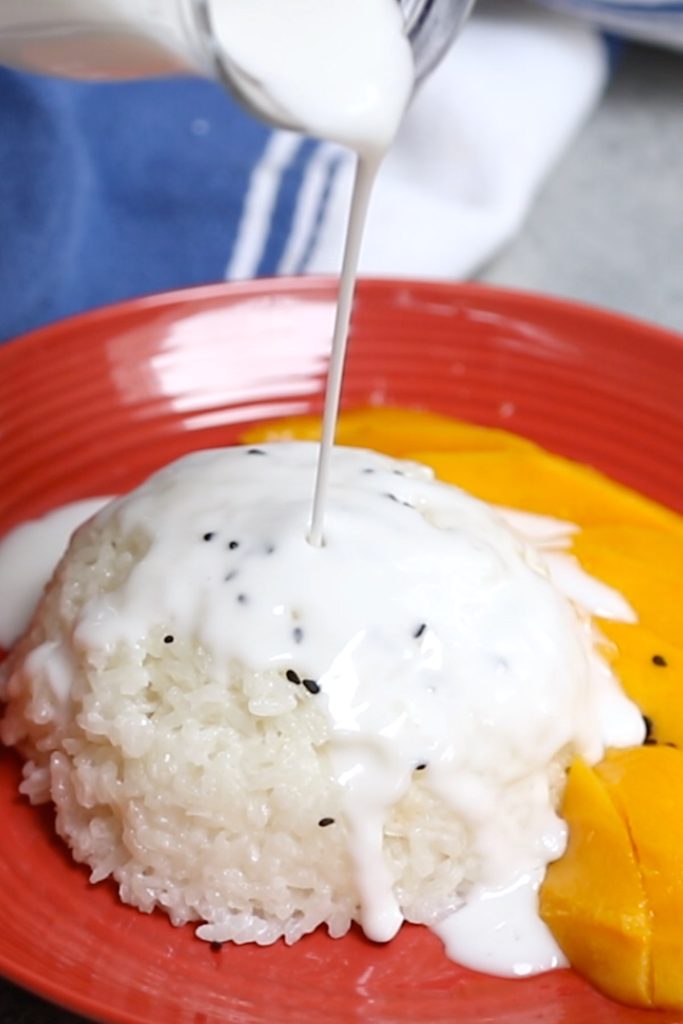
Serve it with sliced mango and sprinkle with sesame seeds.
Serving Sweet Sticky Rice
The authentic way is to serve the WARM sticky rice with cold mango. The coconut sauce should be lukewarm too.
For a quick serving, you can simply scoop out the rice to a plate and add sliced mango next to it. Drizzle more coconut sauce on top of the rice and garnish with sesame seeds.
For a fancier look like the ones in the photos on this post, you can transfer about 1/2 cup of coconut rice to a small mixing bowl. Flip the bowl onto a plate and remove the bowl. Voila! You’ll have a show-stopping dome-shaped coconut sticky rice!
Storage and Make Ahead
This recipe is best on the day it’s made, but the leftover sticky rice keeps well in an airtight container in the fridge for up to 3 days. You can also freeze the sticky rice in the freezer for up to 1 month. The coconut sauce can last longer, for about 1 week in the fridge.
To reheat, warm it up in the microwave for about 2 minutes. Add a splash of coconut milk to the sauce if it’s too thick.
Make ahead: You can make the coconut sauce a few days ahead of time. Store it in the fridge and reheat it before serving.
More Delicious Asian Desserts
If you like the sticky and chewy texture, try out one of these Asian dessert recipes next:
No-Soak Mango Sticky Rice Recipe
Equipment
Ingredients
Sticky Rice
- 1 cup glutinous rice*, it can also be labeled as sweet rice
- 1 ¼ cup water
Coconut Sauce
- 1 can (13.5 oz / 400 g) coconut milk**, you can also use coconut cream and omit cornstarch slurry
- 1/4 cup sugar
- 1/2 teaspoon salt
- 1 teaspoon cornstarch
- 1 tablespoon water
For Serving
- 2 tablespoons sesame seeds
- 2-3 mangoes, sliced
Instructions
- Cook sticky rice: Add rice to the rice cooker pot. Rinse it under cold running water. Use your hands to swirl the rice around until the water becomes cloudy. Pour out the water and repeat this twice. Make sure to drain the water completely.
- Add 1 and 1/4 cup water to the pot. (It’s important to use the right ratio for the perfect texture)
- Place the rice pot in the rice cooker. Select the “Sweet” function. If your rice cooker doesn’t have this option, set it to “Cook” or the regular setting for cooking jasmine rice, but they may not be as sticky and fluffy. I used Zojirushi rice cooker and it takes about 40 minutes for my rice to be ready.
- Make the sauce: You can make the sauce when the rice is cooking. In a skillet or saucepan over medium-low heat, add coconut milk, sugar, and salt. Cook until the mixture is hot. This will take about 3-4 minutes. (Don’t bring the mixture to a boil)
- In a small mixing bowl, mix together the cornstarch and water. This will give you a cornstarch slurry to thicken the sauce. Start with half of the slurry to the sauce, and add more if needed (You don’t have to use up all the slurry). Stir constantly to thicken the sauce until it can coat the back of a spoon. The sauce doesn’t need to be too thick. I like it to be slightly runny and it’s not overly sweet.
- Mix the rice with the sauce: Once the timer of the rice cooker goes off, leave the rice cooker closed for 5 minutes. Then remove the pot from the rice cooker.
- Start by adding 1/2 cup of the coconut sauce to the pot. Mix the rice with the sauce using a wooden spoon or rice cooker spoon. Taste and add more sauce GRADUALLY. It’s very important NOT to add too much sauce at once, as you cannot undo this and our preference for sweetness is different.
- Let your sweet rice cool to room temperature.
- Shape the rice and serve: Transfer about 1/2 cup of coconut rice to a small mixing bowl. Flip the bowl onto a plate, and wait for about 30 to 60 seconds. You should be able to lift the bowl easily. Add sliced mango next to the rice. Drizzle more coconut sauce on top of the rice and garnish with sesame seeds.
- Serve warm and enjoy!
Notes
- *Some sticky rice is NOT glutinous rice. Make sure your package is labeled “ glutinous rice” or “sweet rice”.
- **I used unsweetened coconut milk and added sugar to the sauce. You can also use a sweetened version, and omit sugar.
Nutrition
Nutrition information provided is an estimate only and will vary based on ingredient brands and cooking methods used.
This post may contain affiliate links. Please read my disclosure policy.