Sous Vide Crème Brûlée (With or Without Mason Jars)
on Dec 11, 2023
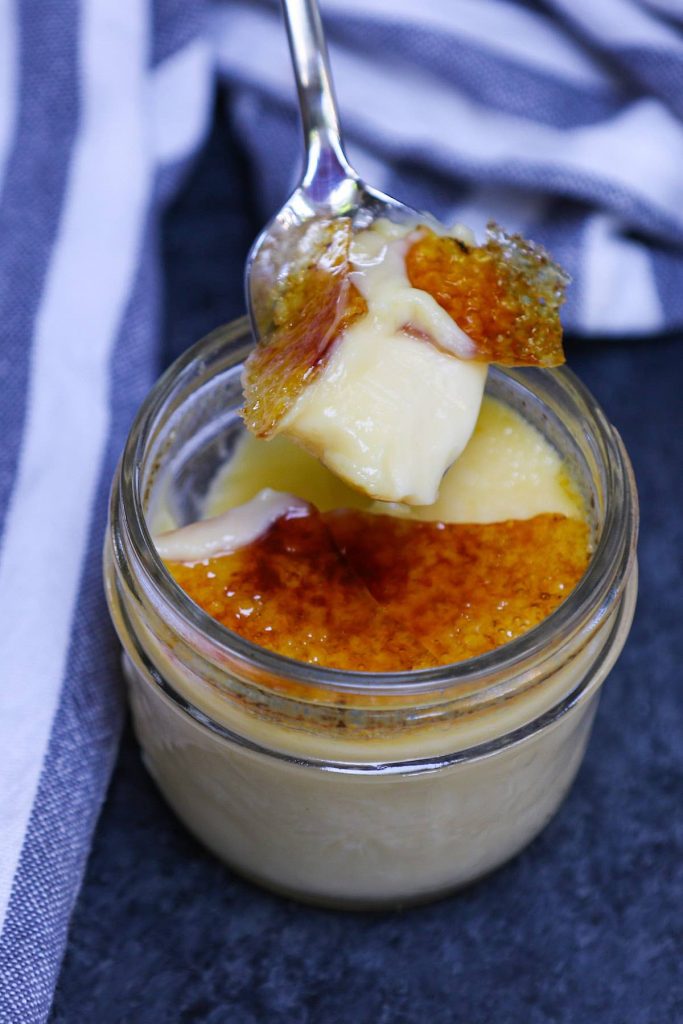
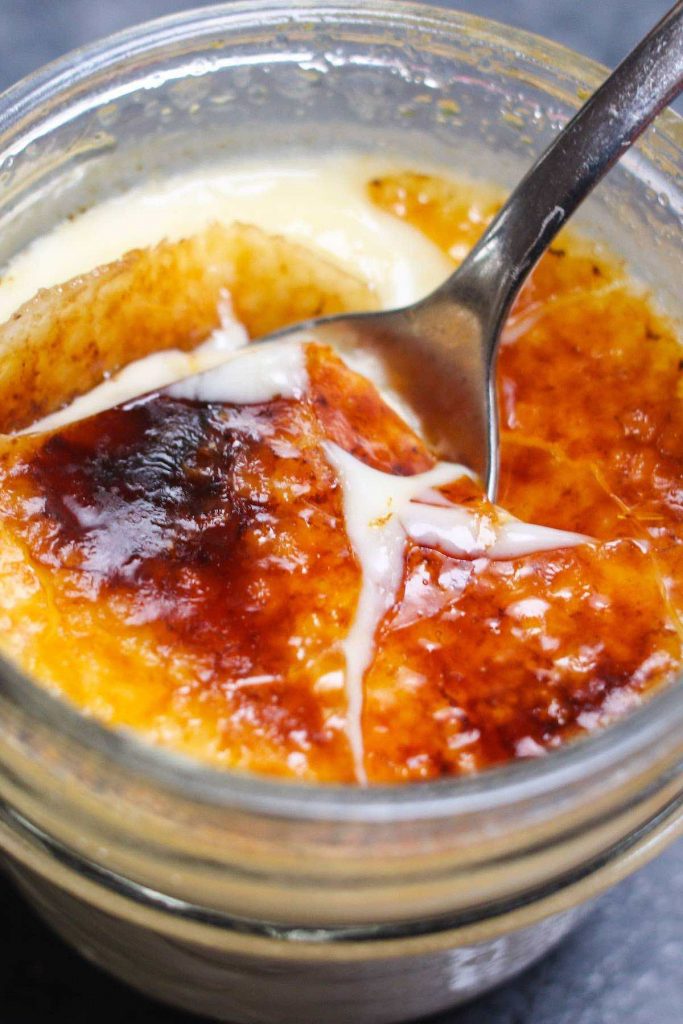
This Sous Vide Crème Brûlée recipe is the easiest and foolproof way to make this elegant French dessert at home! The perfect creamy and silky-smooth custard is topped with a crispy layer of caramelized sugar! It requires only 5 ingredients. No need to temper the eggs, and no risk of a curdled texture or overcooking the custard!
Too good to be true? Sous vide technique guarantees the perfect results EVERY TIME by cooking this dessert to the precise temperature you set. Add fresh berries and mint for a show-stopping dessert to impress your guests.
Watch Sous Vide Crème Brûlée Recipe Video
Related: If you enjoy this sous vide crème brûlée recipe, you’ll love my Sous Vide Cheesecake. They’re also made in individual mason jars!
Why Sous Vide Cook Crème Brûlée?
- It’s foolproof and incredibly easy to make! Skip the steps required by traditional method such as heating up the heavy cream, “tempering eggs”, or adjusting baking time for different-size ramekins.
- It lasts for up to 2 weeks in the fridge, much longer than the oven baked crème brûlée which only lasts 3-5 days.
- You can make it in bulk ahead of time!
- Guaranteed success! This recipe takes all the guess work out, and guarantees the perfect consistency every single time.
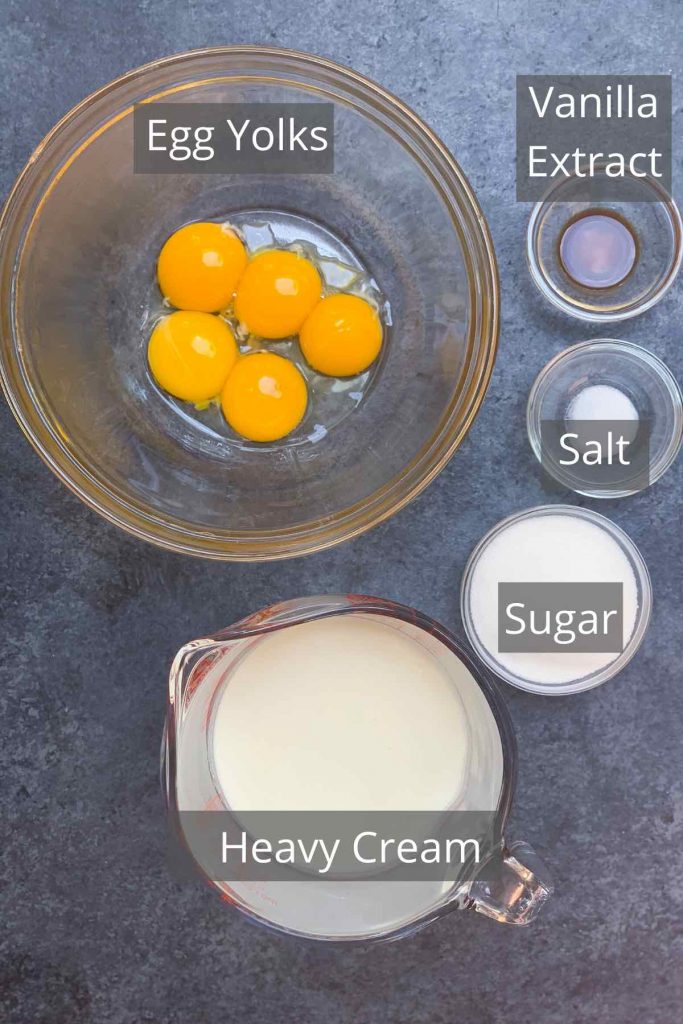
Sous Vide Crème Brûlée Recipe Ingredients
Here’s what you’ll need to make this sous vide crème brûlée recipe:
- Heavy Cream – Use full fat heavy cream to ensure a creamy and stable consistency.
- Egg Yolks – Help to thicken and stabilize the custard. To achieve the best texture, the best ratio is to use 5 large egg yolks with 2 cups of heavy cream.
- Sugar – Regular granulated sugar works the best. You’ll need it for both making the custard and the caramelized topping.
- Salt – Enhance the overall flavor by balancing the sweetness.
- Vanilla Extract – Enhance the flavor and aroma of the dessert.
Let’s Make This No-Fail Sous Vide Crème Brûlée
Follow the simple steps below and your sous vide crème brûlée will turn out perfectly every time!
- Whisk egg yolks, sugar, salt, and vanilla extract: Add them to a large bowl and whisk to form a thick paste.
- Make the custard: Slowly add heavy cream and mix everything until smooth. Note that you don’t need to heat up the heavy cream like the traditional method, as your eggs won’t curdle with the sous vide method.
- Strain: Strain the custard mixture through a fine mesh sieve to remove any residues from the egg.
- Pour the custard filling into mason jars. I used 4-oz mason jars, which is a perfect size for making crème brûlée. Make sure to dry them completely before cooking. Close the lid “fingertip tight”. (You can easily open it with 2 fingers).
- Sous vide cook: Fill the container or pot with water and attach a sous vide circulator. Set the temperature to 179°F (82°C). Place the mason jars in the water while the water is still heating up. Cook for 1 hour.
- Cool and chill: Once cooked, remove the mason jars from the water bath. Open the lid to cool down the custard on the counter for 30 minutes. Dry the top of the lids with paper towels. Once cooled, put the lid back on. Chill crème brûlées for at least 4 hours in the fridge.
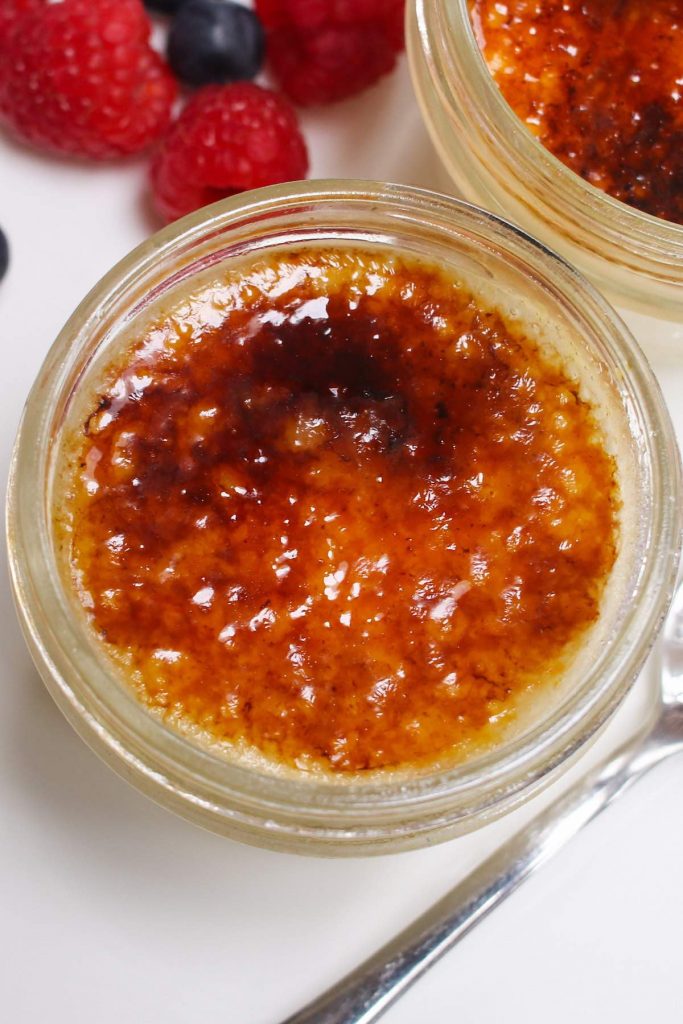
- Caramelize the sugar topping: For the best result, use a blow torch for a perfect caramel layer! Pro Tip: Don’t caramelize the sugar topping until you are ready to serve!
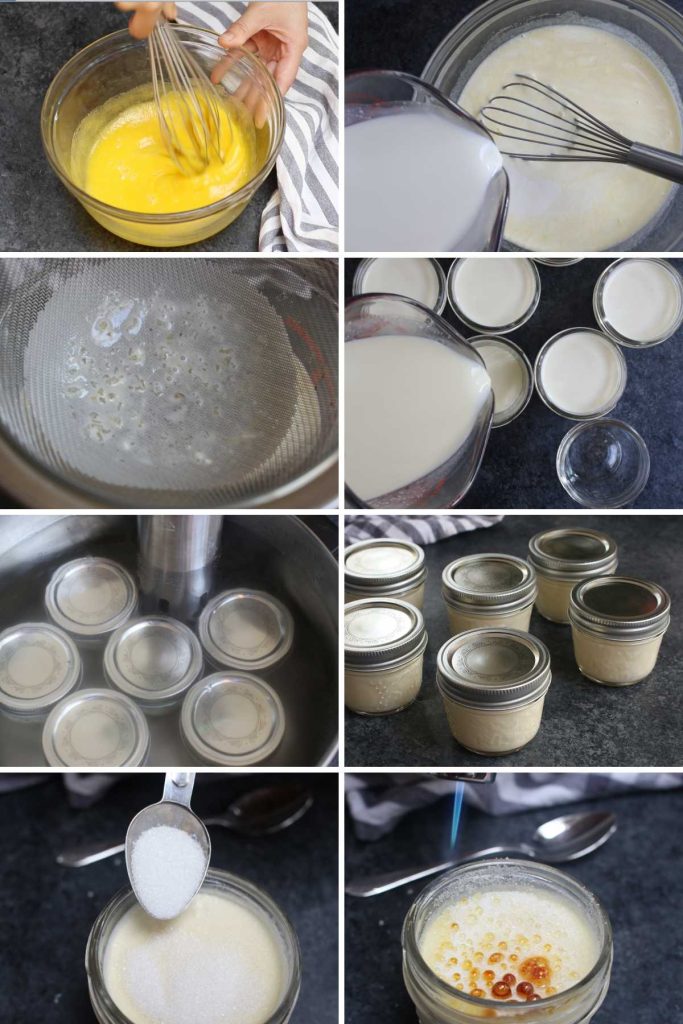
- Sprinkle the surface of each custard EVENLY with 1.5 teaspoons of sugar. The regular granulated sugar works the best. Make sure to cover the entire surface with a thin layer of sugar.
- Using a kitchen torch, hold the flame about 2 inches from the surface of the sugar. Move the flame across the surface and make sure all the sugar granules have melted. The longer you torch, the darker and more bitter the caramel layer will become.
Let it rest for 2 minutes until the surface cools down and hardens. Once you’ve caramelized the sugar topping, it’s best to serve it within 20 minutes. Otherwise, the sugar will absorb moisture and the top will start to soften. You can decorate it with fresh fruits and serve with a dessert spoon.
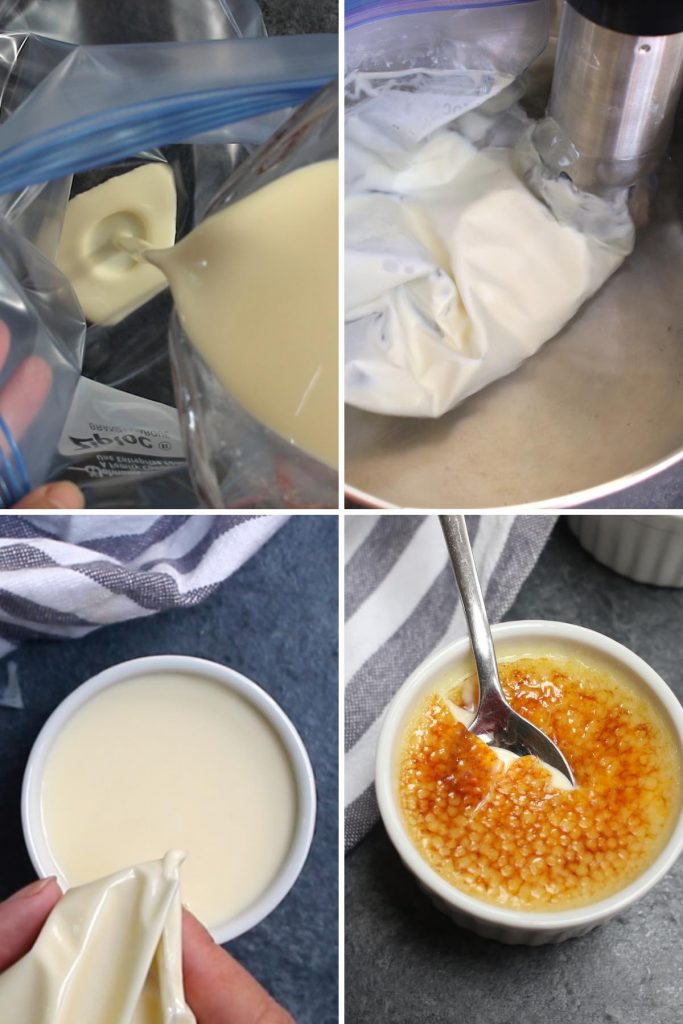
Sous Vide Crème Brûlée without Mason Jars
If you don’t have mason jars, you can still make this recipe! Pour the custard filling into a ziptop bag. Vacuum seal the bag using the “water displacement technique”. Cook the custard mixture for 1 hour in the sous vide water bath, and pour it into ramekins once cooked. The rest of the steps are the same as using mason jars.
Tips for Making it Ahead
This is a great make-ahead dessert for a party. You can sous vide cook your crème brûlée, chill and seal each mason jar tightly. It can last in the refrigerator for up to 2 weeks! When you are ready to serve, simply add the sugar layer and torch it right before serving.
Note that you cannot caramelize the sugar topping ahead of time.
More Favorite Sous Vide Recipes
If you love sous vide crème brûlée recipe, try one of these delicious sous vide recipes next:
- Sous Vide Egg Bites
- Sous Vide Poached Eggs
- Sous Vide Sirloin Steak
- Sous Vide Potatoes
- Sous Vide Carrots
★★★★★ A Reader’s Review
“This is by far the most delicious (and easiest) creme brûlée ever! I used the bag method, and it could not have come out any creamier – no bubbles, no grit, nothing! Everyone absolutely RAVED over it and said it was just as good, if not better, than any they’ve ever had at even the most expensive restaurants (myself included). This is my new go-to for parties, especially since you can make it ahead. I had a couple left over, and 3 days later, they were just as good as day 1.”
— TJ

Sous Vide Crème Brûlée (With or Without Mason Jars)
Ingredients
For the Custard
- 5 large egg yolks
- 1/2 cup granulated sugar
- 2 cups heavy cream, (or heavy whipping cream, 35% fat)
- 1/4 teaspoon salt
- 1 teaspoon vanilla extract
For the Topping
- 1/4 cup granulated sugar, about 1 ½ teaspoons for each crème brûlée
- Optional: fresh berries to serve with
Instructions
- Prepare the Custard: In a large bowl add egg yolks, sugar, salt, and vanilla extract. Whisk together the ingredients until well mixed.
- Slowly pour the heavy cream into the egg mixture. Stir until well mixed.
- Strain the mixture, and slowly pour it into each mason jar, leaving about 1/2 inch from the top. (Make sure the mason jars and the lids are dry). If you don’t have canning mason jars, you can use zip-lock bags* (see recipe notes).
- Let them sit for 15-20 minutes so that bubbles can dissipate.
- Place the lid on each mason jar, and twist it gently until “fingertip tight” (This means the lid is barely closed and can be easily open with 2 fingertips.)
- Fill a large container or pot with water, attach the sous vide precision cooker and set the temperature to 179ºF/82ºC.
- Sous Vide Cook the Custard: Use a pair of kitchen tongs and slowly place the mason jars into the sous vide water bath. Cook for 1 hour. (It's best to place the mason jars into the water bath BEFORE it's heating up to avoid the risk of cracking.)
- Chill the Custard: Remove the mason jars from the water bath.
- Once the mason jars are not too hot to touch, open the lid and let them cool at room temperature for 30 minutes. In the mean time, dry the lid completely.
- Once the jars are cool. Put back the lid and fasten it tightly. Let the custard chill in the fridge for at lease 4 hours. (Or up to about 2 weeks).
- Burn the Sugar: When you are ready to serve, take the mason jars out of the fridge and remove the lid. Add about 1 ½ teaspoons sugar on top of each custard. Make sure to add enough sugar and cover the surface evenly.
- Use a kitchen torch to torch the tops until the sugar melts and caramelizes.
- Decorate with fresh berries and mint and serve immediately.
- For leftovers, you can store them in the fridge and they'll last for up to 2 weeks.
Video
Notes
- *Making sous vide crème brûlée without mason jars: Pour the custard filling into a ziploc bag. Vacuum seal the bag using the “water displacement” technique. Cook the custard filling for 1 hour in the sous vide water bath, and pour the custard into ramekins once cooked. The rest is the same as using mason jars.
- How to caramelize the sugar top without a torch? You can broil them in the oven. Heat your broiler up super hot and make sure to position the rack just underneath. Place the custards on a tray and top with sugar. Watch carefully as it only takes 1-3 minutes. Note that you will get less even coloring than with a torch.
- Troubleshooting crème brûlée:
- Why is my crème brûlée runny? If your crème brûlée comes out runny, it’s most likely that you’ve added too much heavy cream. Otherwise, it could happen when it’s undercooked.
- How can I prevent mason jars from cracking? When the jar is closed tightly, the excess air cannot escape from the glass, causing too much pressure to build up inside of the jar, and making it crack. To prevent this from happening, you’ll need to close the lid just barely, so that 2 fingertips can open it. In addition, adding the mason jars to the water bath when the water is not completely heated will also help to avoid the “Thermal Shock”.
- Why does my crème brûlée have a bumpy texture with bubbles? When you whisk cream and eggs together, the mixture will have foam on top. If you don’t strain the mixture, you’ll see some bubbles on the surface once the custard is cooked. I also recommend letting your custard rest in the mason jars for 20 minutes before cooking in sous vide.
Nutrition
Nutrition information provided is an estimate only and will vary based on ingredient brands and cooking methods used.
This post may contain affiliate links. Please read my disclosure policy.

Delicious – extra creamy and decadent compared to other crème brûlée. Easier to cook and was a huge hit at my daughters birthday today! Everyone was raving about it! Took longer than an hour and 10 mins if you add time to heat l up the machine (took about an hour for mine) and cooling time.
This is my go-to recipe for Creme Brulee. Easy to prepare and comes out amazing every time – everyone is always impressed! Thanks Izzy!
This is the best and easiest crème brûlée. This was only the second recipe I made with my sous vide. The first one was miso chicken breasts. Both have converted me 100%. I have made probably 100 other things in my sous vide since and my family always wants crème brûlée. It’s so good and so easy and creamy and perfect. Added bonus, the third recipe that I made was sous vide egg bites with the leftover egg whites and it has turned me into a huge fan of those as well. Especially with corned beef and shallots and Swiss cheese. Just lovely thank you for such a great recipe!