Daifuku (Mochi and Anko Filling Recipes)
on Jun 16, 2020, Updated Jul 15, 2020
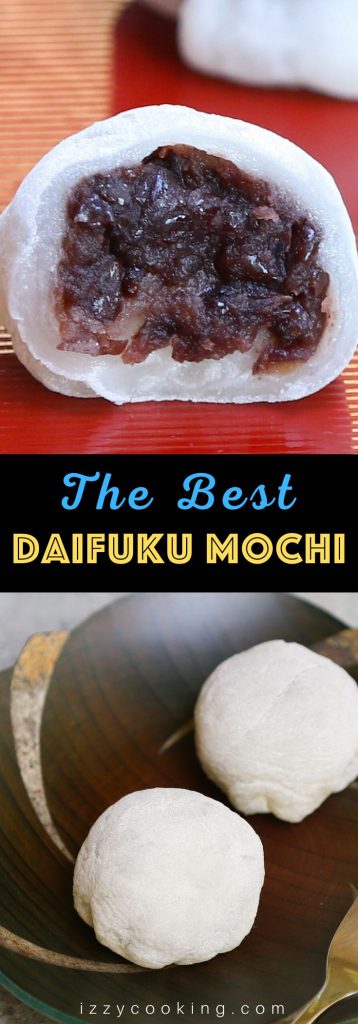
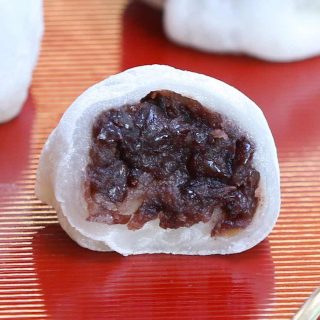
Daifuku!! This popular Japanese recipe makes a soft, tender, and chewy mochi rice cake enclosing a creamy, sweet anko red bean paste filling. Pure dessert bliss! With some simple tips, you can make this delicious snack in your own home and customize with your favorite fillings.
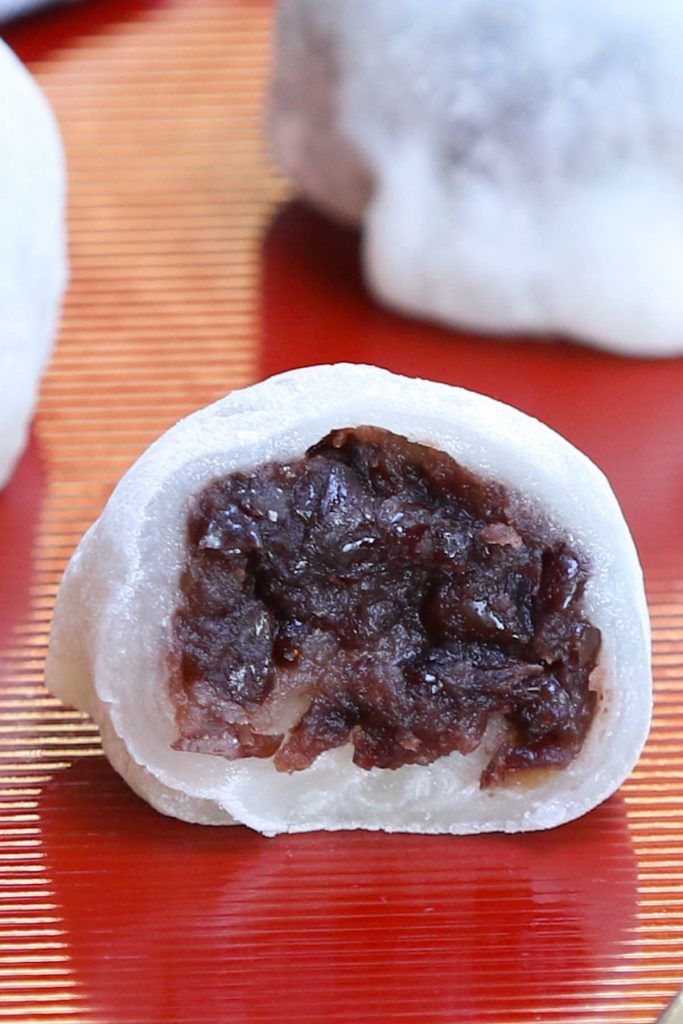
These daifuku taste just like the best ones I had in Japan. They have the perfect combination of flavors and textures. For those unfamiliar, Daifuku or Daifuku Mochi consists mochi (a Japanese rice cake made with glutinous rice flour) on the outside, and sweet red bean paste on the inside. It’s a type of wagashi (Japanese sweets), a popular delightful and cute Japanese treat.
The mochi is perfectly soft and chewy, with a nice rice flavor. The red bean paste (anko) is creamy and deliciously sweetened. Traditionally daifuku is served with green tea.
Don’t be deterred by the number of steps in this recipe. It’s actually quite easy to prepare with only 4 ingredients (plus water), and they’re so delicious and absolutely worth the effort to learn!
Ingredients for Making Mochi
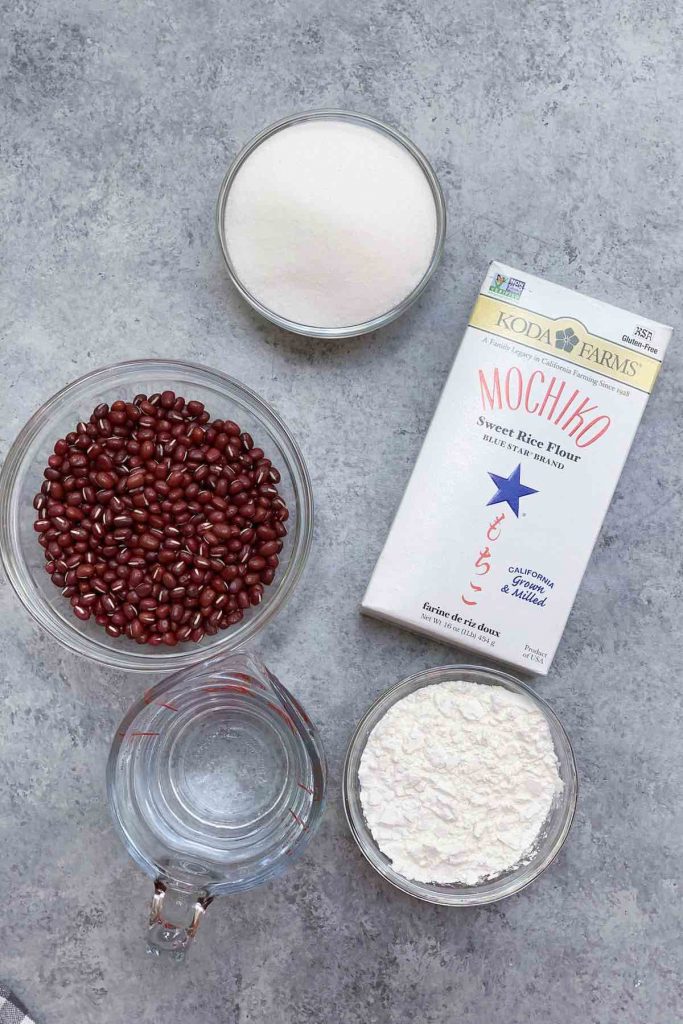
- Mochiko or Shiratamako (sweet glutinous rice flour)
- Water
- Granulated sugar
- Cornstarch
Pro Tip: The key to the best daifuku is using Mochiko or Shiratamako (sweet rice flour), which is different than regular glutinous rice flour. You can find them in most Japanese grocery stores, or order them online from Amazon.
Ingredients for Making Red Bean Paste
- Azuki beans (red beans)
- Water
- Granulated sugar
How to Make Red Bean Paste Filling
You’ll need to prepare the Anko red bean paste ahead of the time and ideally get it chilled in the refrigerator before making the mochi.
- Add rinsed azuki red beans and water to a saucepan over medium-high heat.
- Boil for 5 minutes, and then discard the water, leaving the red beans in the pan.
- Add more water and bring to boil again, and cover with a lid. Turn down the heat to medium-low, and let it simmer for 1 to 1.5 hours until you can easily mash the beans with your fingers.
- Drain the azuki beans and put them back into the pot.
- Turn the heat to medium-low, and add sugar. Stirring constantly until it reaches your desired consistency.
- Transfer it to a flat baking dish to let it cool completely.

Pro Tip: The instruction above will make chunky anko red bean paste, which I like to use in my daifuku. If you prefer a smooth texture, you can puree the beans in a food processor before adding the sugar. If you’d like to save time, you can also buy premade red bean paste from a local Asian supermarket or online from Amazon.
How to Make Mochi Wrapper (the Easiest Method)
Traditionally mochi is made of short-grain glutinous rice and it’s quite labor intensive. I don’t have time to cook and pound the rice so this version is super easy, ready in a few minutes, and has all the delicious qualities you want in classic mochi.
- Place a large sheet of parchment paper on the working surface, and dust it generously with cornstarch. Set it aside.
- Whisk together mochiko and sugar in a microwave-safe bowl. Add water and mix well.
- Cover the bowl with plastic wrap loosely. Microwave on high for 2 minutes. Take it out and mix with a wet spatula.
- Cover and microwave for 30 more seconds until the dough has changed from white to slightly translucent.
- Transfer the mochi dough onto the parchment paper. Sprinkle more cornstarch onto the dough.
- Roll out your dough into a thin piece (about 1/8-inch thickness).
- Cut the dough into circles. (Don’t waste the leftover dough. Squeeze the leftover pieces and knead them into a ball, repeat the process and make a few extra wrappers.)
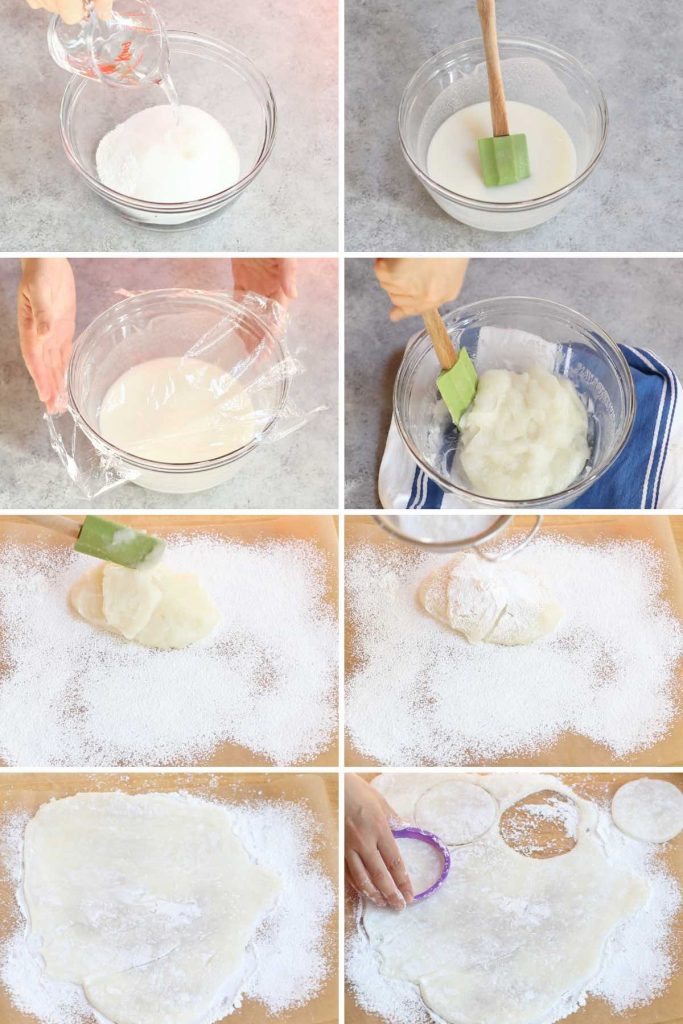
Pro Tip: The dough is very sticky, so you’ll need to add cornstarch frequently during the rolling process.
How to Make Daifuku
The trickiest part of this recipe is to wrap the red bean paste in the mochi wrapper. It may take a few tries to get it into a perfect round shape, but after a few, you’ll get a hang of it:
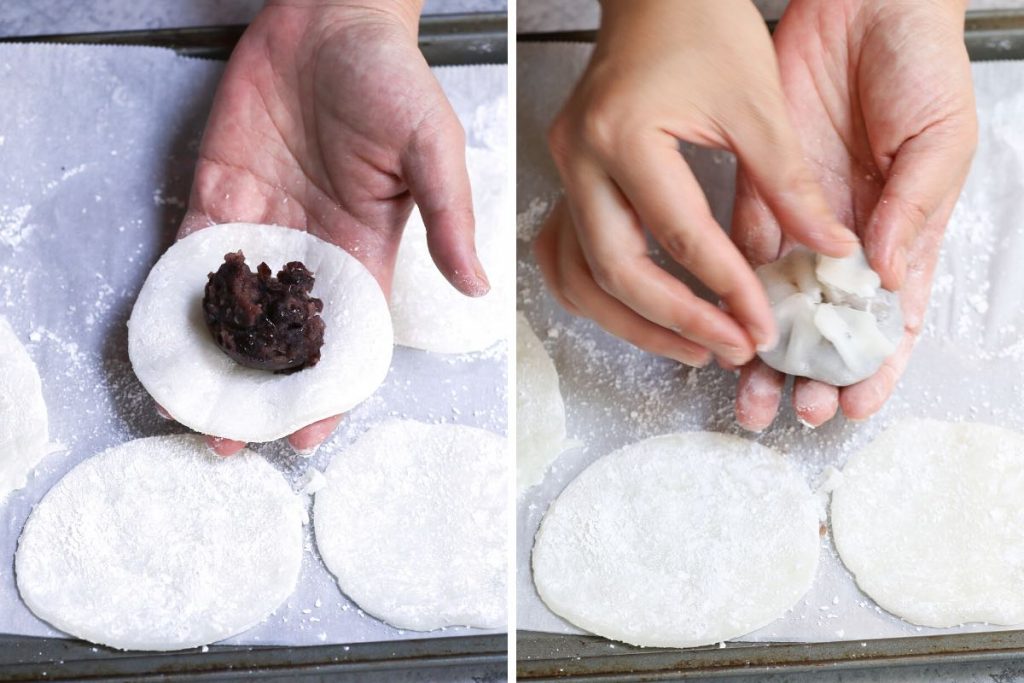
- Scoop out red bean paste on top of a mochi wrapper.
- Pinch the four corners of the mochi wrapper, and then pinch the remaining corners together.
How Long Do They Keep?
Store them in an airtight container in the refrigerator and they can last for 2 days. These daifuku mochi taste the best on the day they’re made.
What Does Daifuku Taste Like?
The mochi layer is sticky, soft, and sweet with a pleasantly chewy texture, something like a marshmallow. Homemade anko red bean paste is sweet and creamy. The combination of the two is heavenly delicious!
Special Equipment Needed
- A rolling pin
- Cookie dough scoop which is smaller than a regular ice cream scoop
- 3.5-inch cookie cutter or a similar size round bowl
Possible Variations:
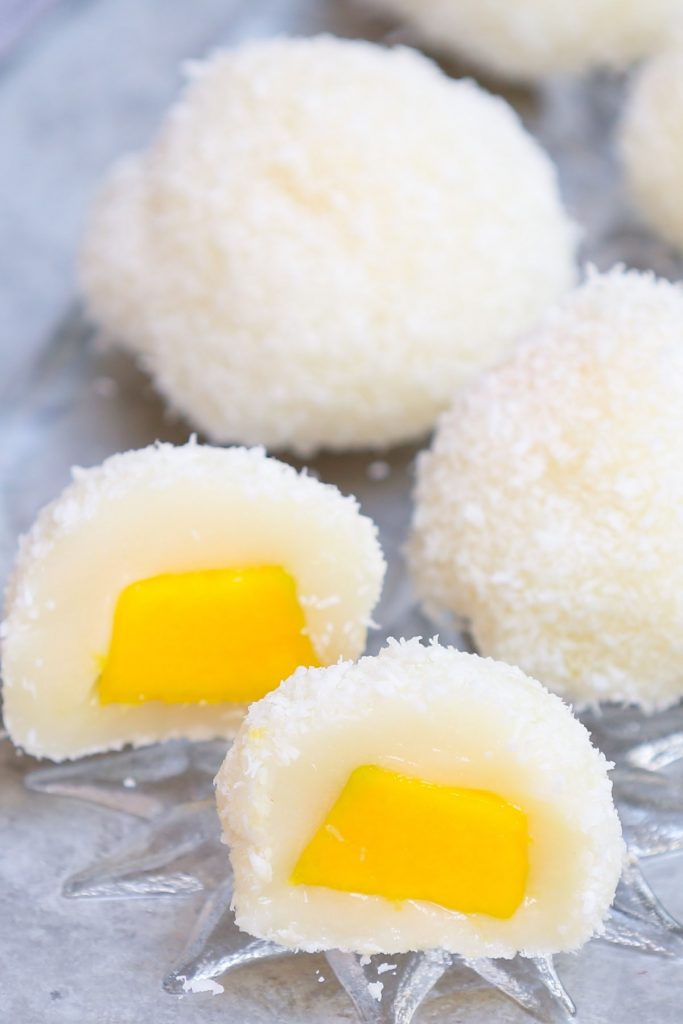
The most popular daifuku is filled with red bean paste, but it is very versatile with endless possibilities for both the mochi wrapper and fillings:
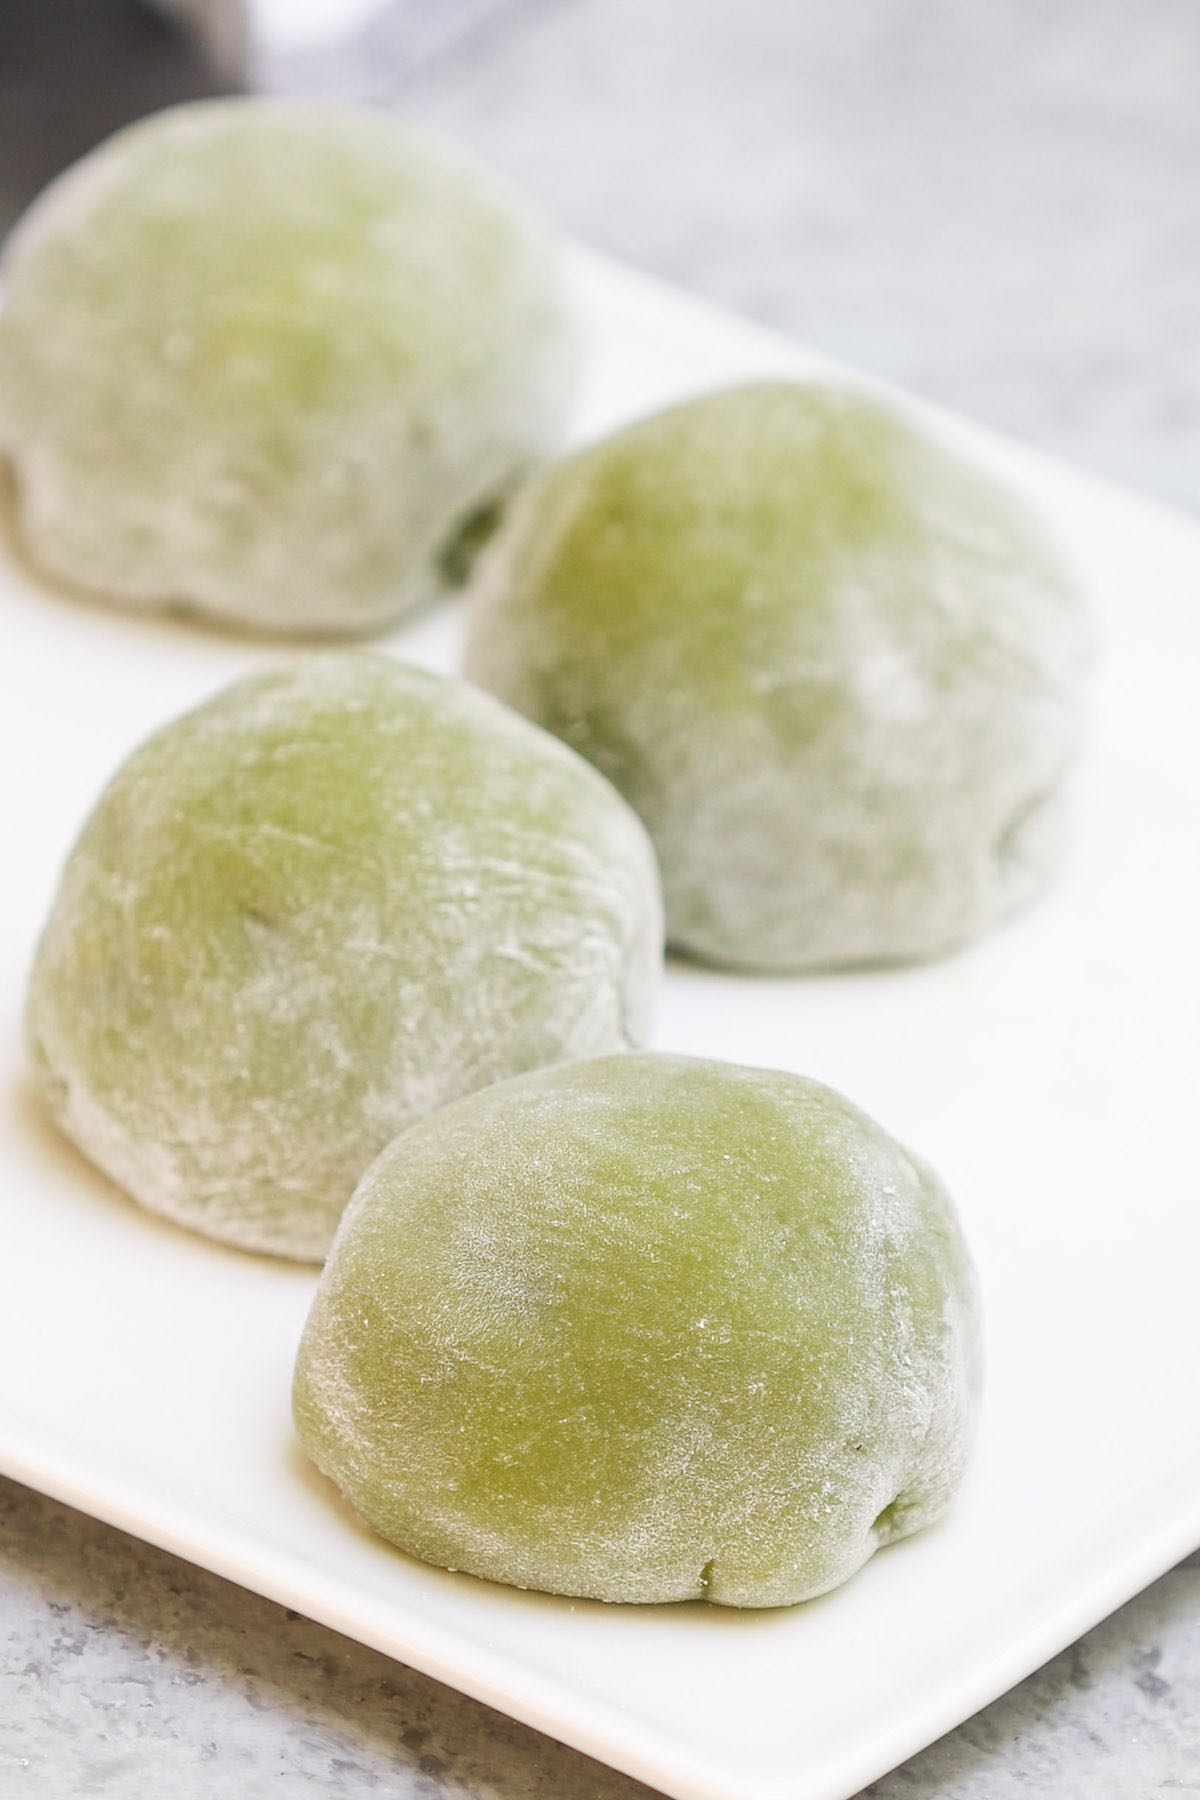
- Add matcha green tea powder to the mochi mixture for a matcha flavor with a green colored dough.
- Add strawberry powder to the mochi mixture for a strawberry flavor with a pink color look.
- Take a major shortcut if time doesn’t allow and use store-bought red bean paste and just use the mochi recipe here.
- You can also use white bean paste (Shiroan).
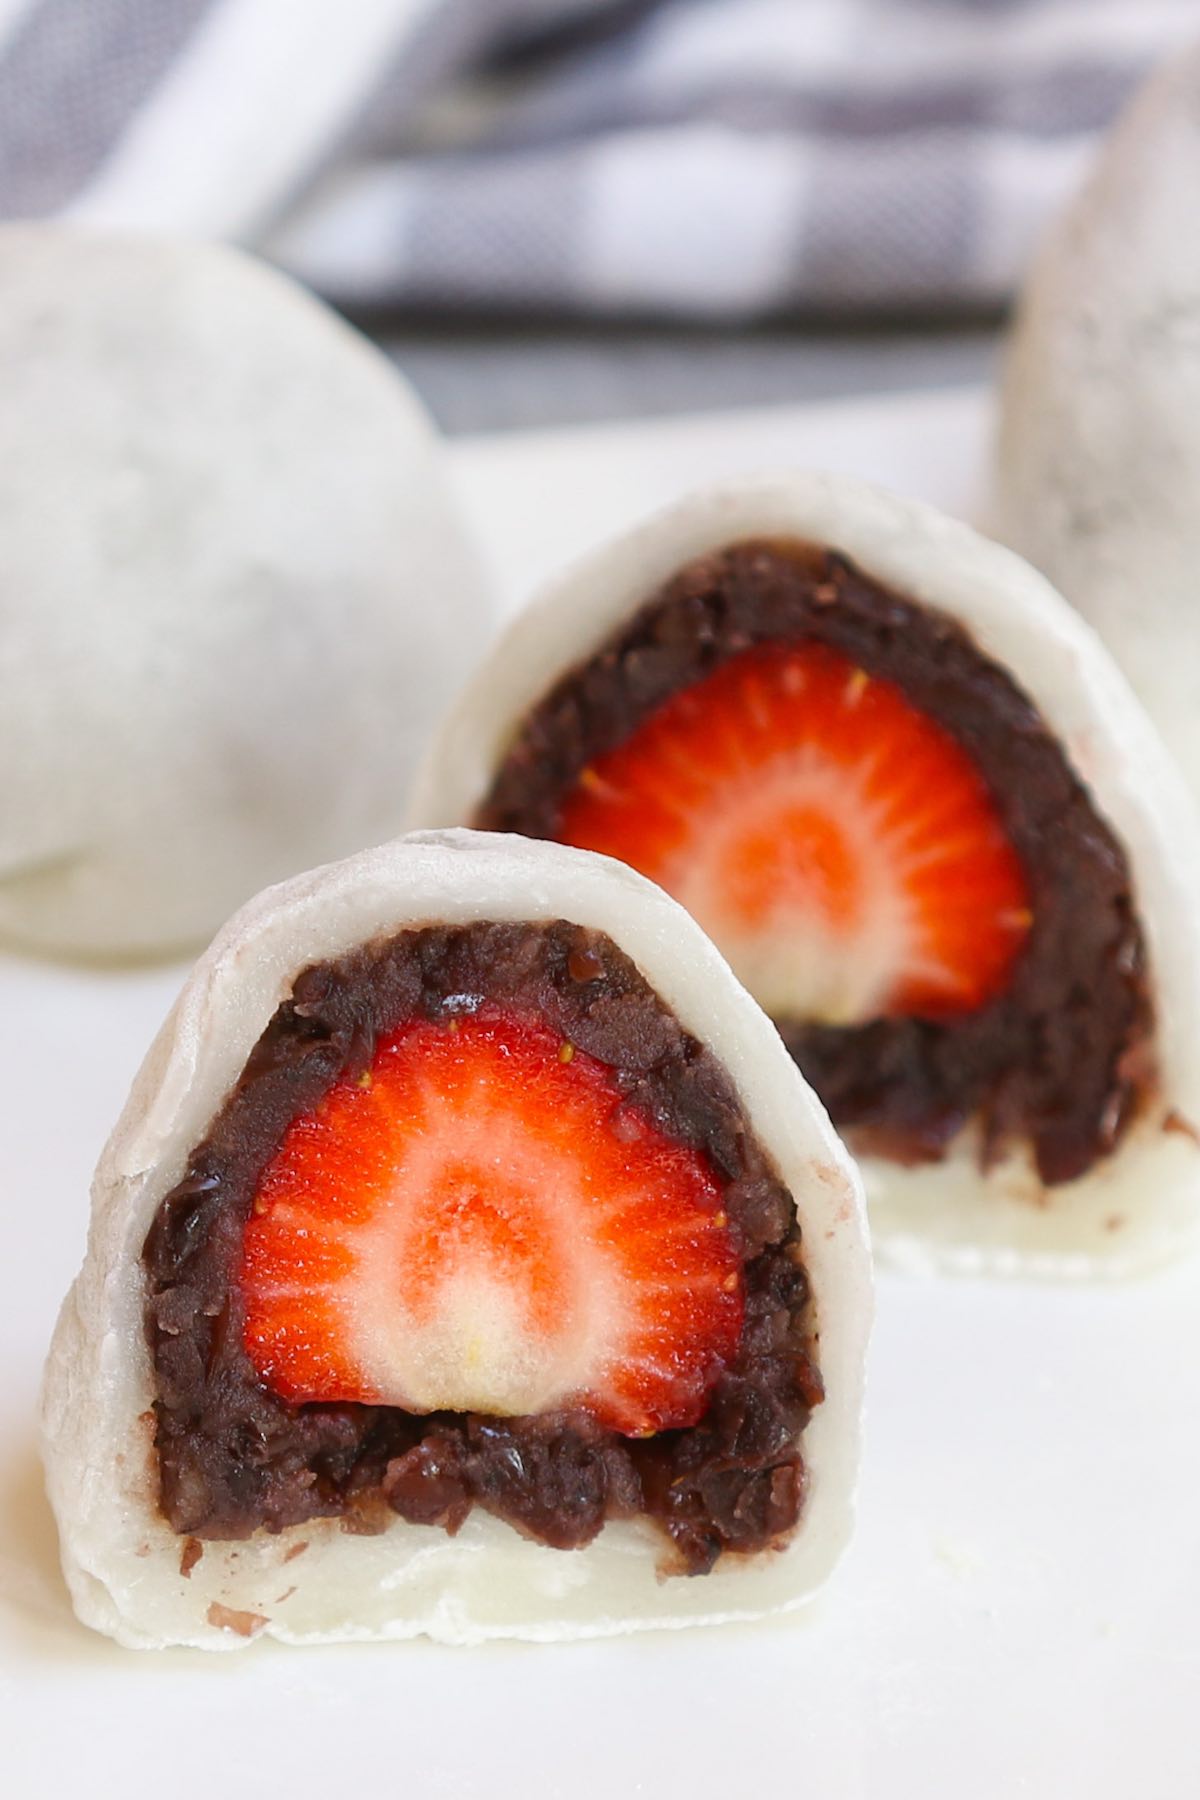
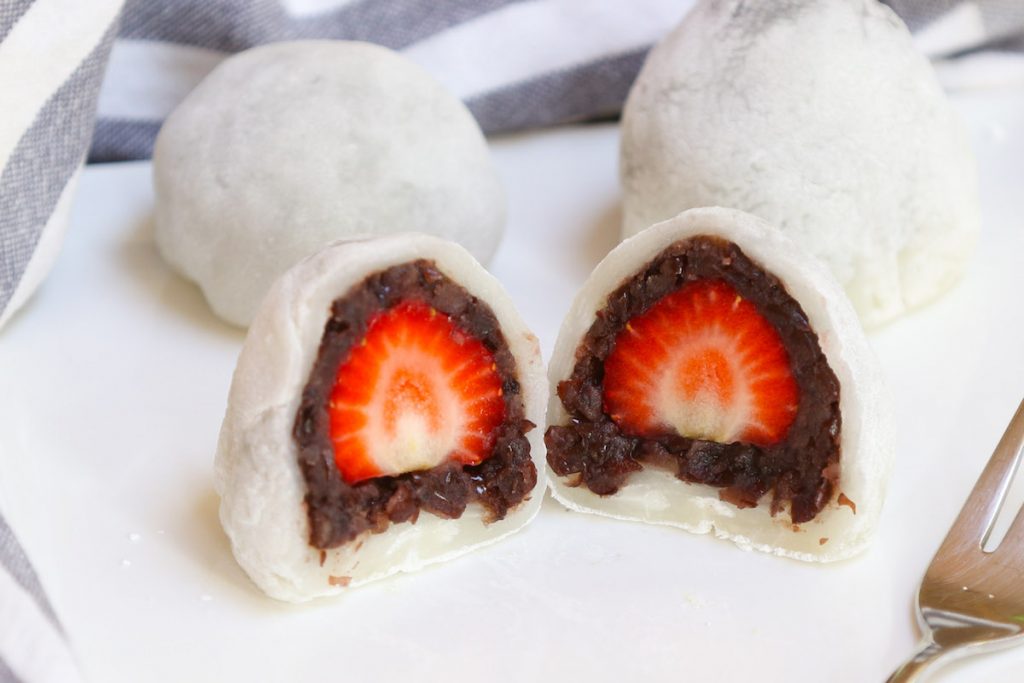
- Place a strawberry inside of the red bean paste for a Strawberry Daifuku.
- Use ice cream as the filling for Mochi Ice Cream.
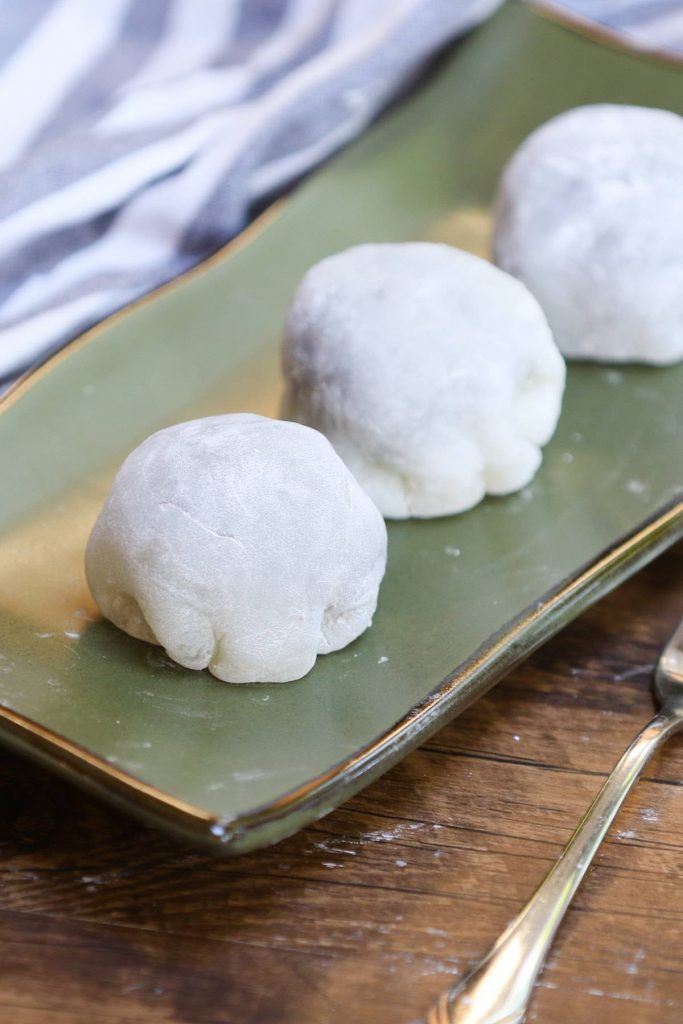
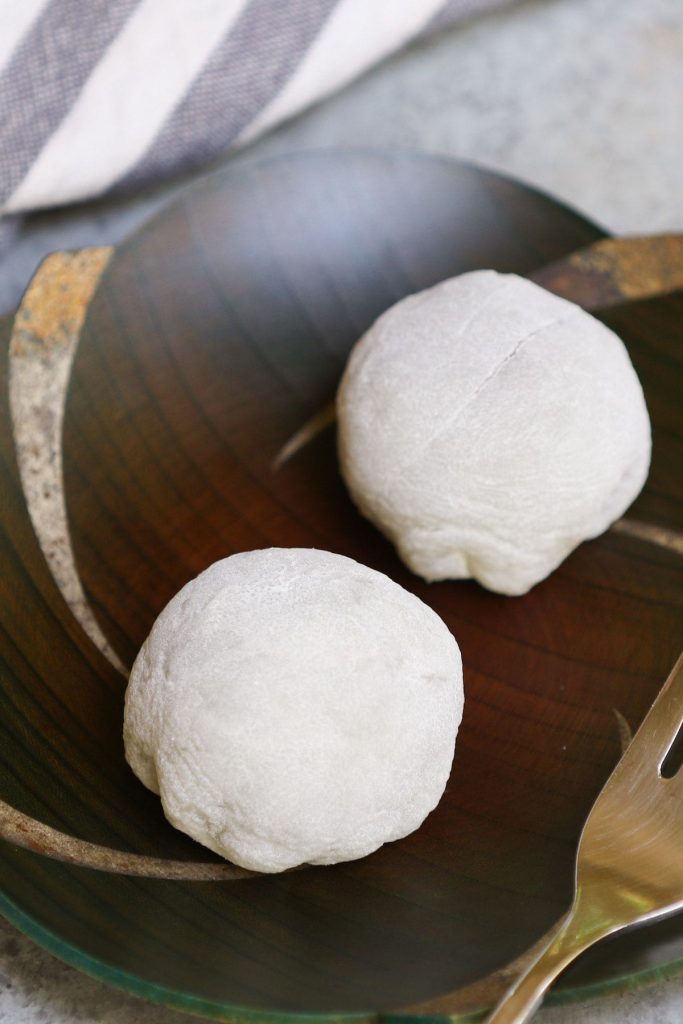
These daifuku mochi balls are not as perfectly shaped as the store-bought ones, but they taste equally delicious.
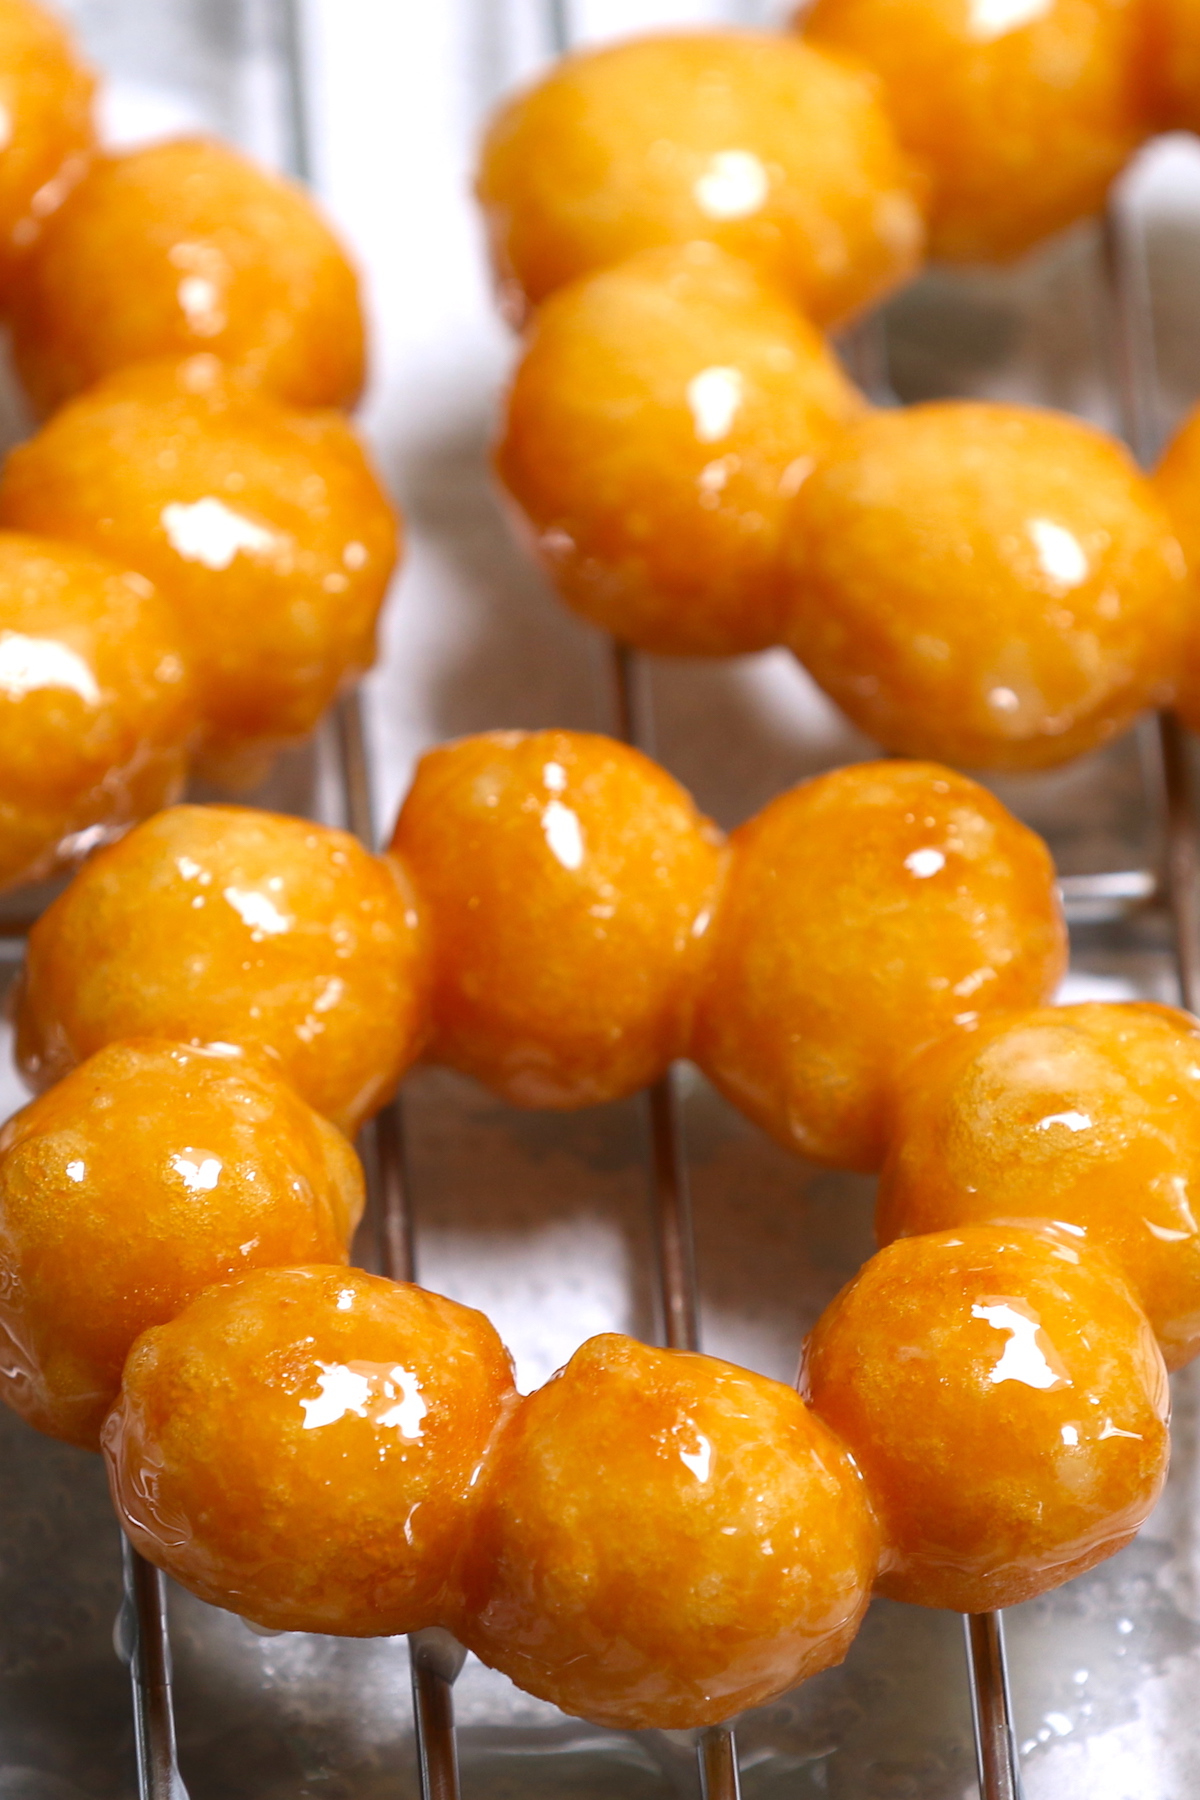
More Delicious Dessert You’ll Love


Daifuku (Mochi and Anko Filling Recipes) + VIDEO
Ingredients
Mochi Wrappers
- 3/4 cup Mochiko, sweet rice flour, or Shiratamako (100g)
- 1/4 cup sugar, 50g
- 3/4 cup water, 180ml
- 1/2 cup cornstarch, for dusting
Anko Sweet Red Bean Paste
- 3/4 cup Azuki red beans
- 3/4 cup sugar
- water
Instructions
For the Anko Red Bean Paste Filling
- Add rinsed azuki red beans and 3 cups water to a sauce pan over medium high heat.
- Boil for 5 minutes, and then discard the water, leaving the red beans in the pan.
- Add 3 cups more water. Bring the water to boil again, and cover with lid. Turn down the heat to medium-low, and let it simmer for 1 to 1.5 hours.
- Check frequently to make sure the beans are submerged in water. Add more water if needed. Cook until you can easily mash the beans with your fingers.
- Drain the azuki beans and put them back into the pot.
- Turn the heat to medium-low, and add half of the sugar. Mix well.
- Once the sugar has dissolved, add the rest of the sugar. Stirring constantly and let the moisture evaporate. Cook until it reaches your desired consistency. Note that the paste will continue to thicken as it cools.
- Transfer it to a flat baking dish to let it cool completely.
For the Mochi Wrapper
- Place a large sheet of parchment paper on the working surface, and dust it generously with cornstarch. Set it aside.
- In a large microwave-safe bowl, whisk together mochiko and sugar. Add water and whisk until smooth and mochiko is completely dissolved.
- Cover the bowl with plastic wrap loosely. Microwave on high for 2 minutes. Take it out and mix with a wet spatula. Place the plastic wrap back and microwave for 30 more seconds until the dough has changed from white to slightly translucent.
- Transfer the mochi dough onto the parchment paper. Sprinkle more cornstarch onto the dough. Roll out your dough into a thin piece (about 1/8-inch thickness).
- Cut the dough into circles using a 3.5-inch cookie cutters. (Don't waste the leftover dough. Squeeze the leftover pieces and knead them into a ball, repeat the process and make a few extra wrappers.)
Assemble Daifuku
- To wrap the red bean paste in the mochi, scoop out red bean paste on top of a mochi wrapper.
- Pinch the four corners of the mochi wrapper, and then pinch the remaining corners together.
- Add cornstarch to the sealed area to prevent it from sticking. Set aside and continue to make the rest of daifuku.
- Enjoy immediately or store in an airtight container in the refrigerator for up to 2 days.
Video
Notes
- The instruction above will make chunky anko red bean paste. If you prefer a smooth texture, you can puree the beans in a food processor before adding the sugar.
Nutrition
Nutrition information provided is an estimate only and will vary based on ingredient brands and cooking methods used.
This post may contain affiliate links. Please read my disclosure policy.