Sakura Mochi (Easy Japanese Pink Mochi Recipe)
on Aug 24, 2020, Updated Mar 04, 2026
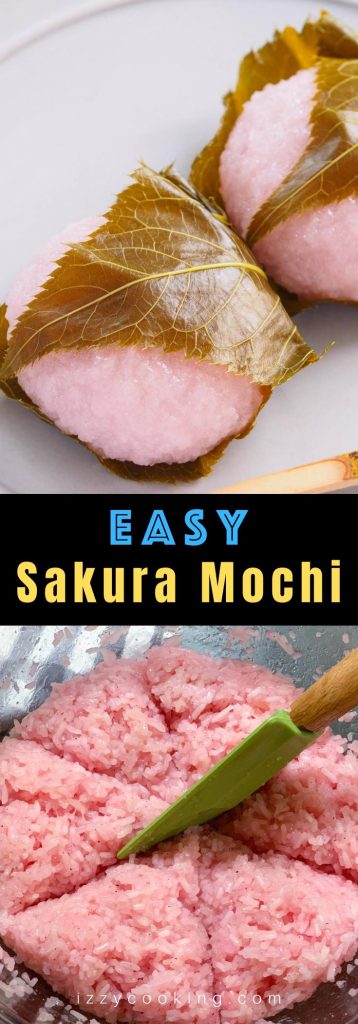
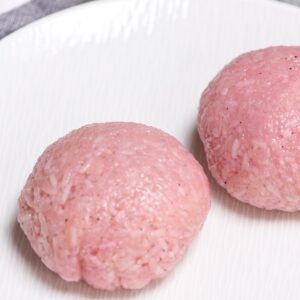
Sakura Mochi with chewy and sticky rice cake on the outside, and sweet red bean paste filling on the inside! It’s rolled into beautiful pink mochi balls and covered with an edible pickled cherry blossom leaf. This Japanese dessert recipe is quick to make at home and perfect for celebrating the spring season or other special occasions.
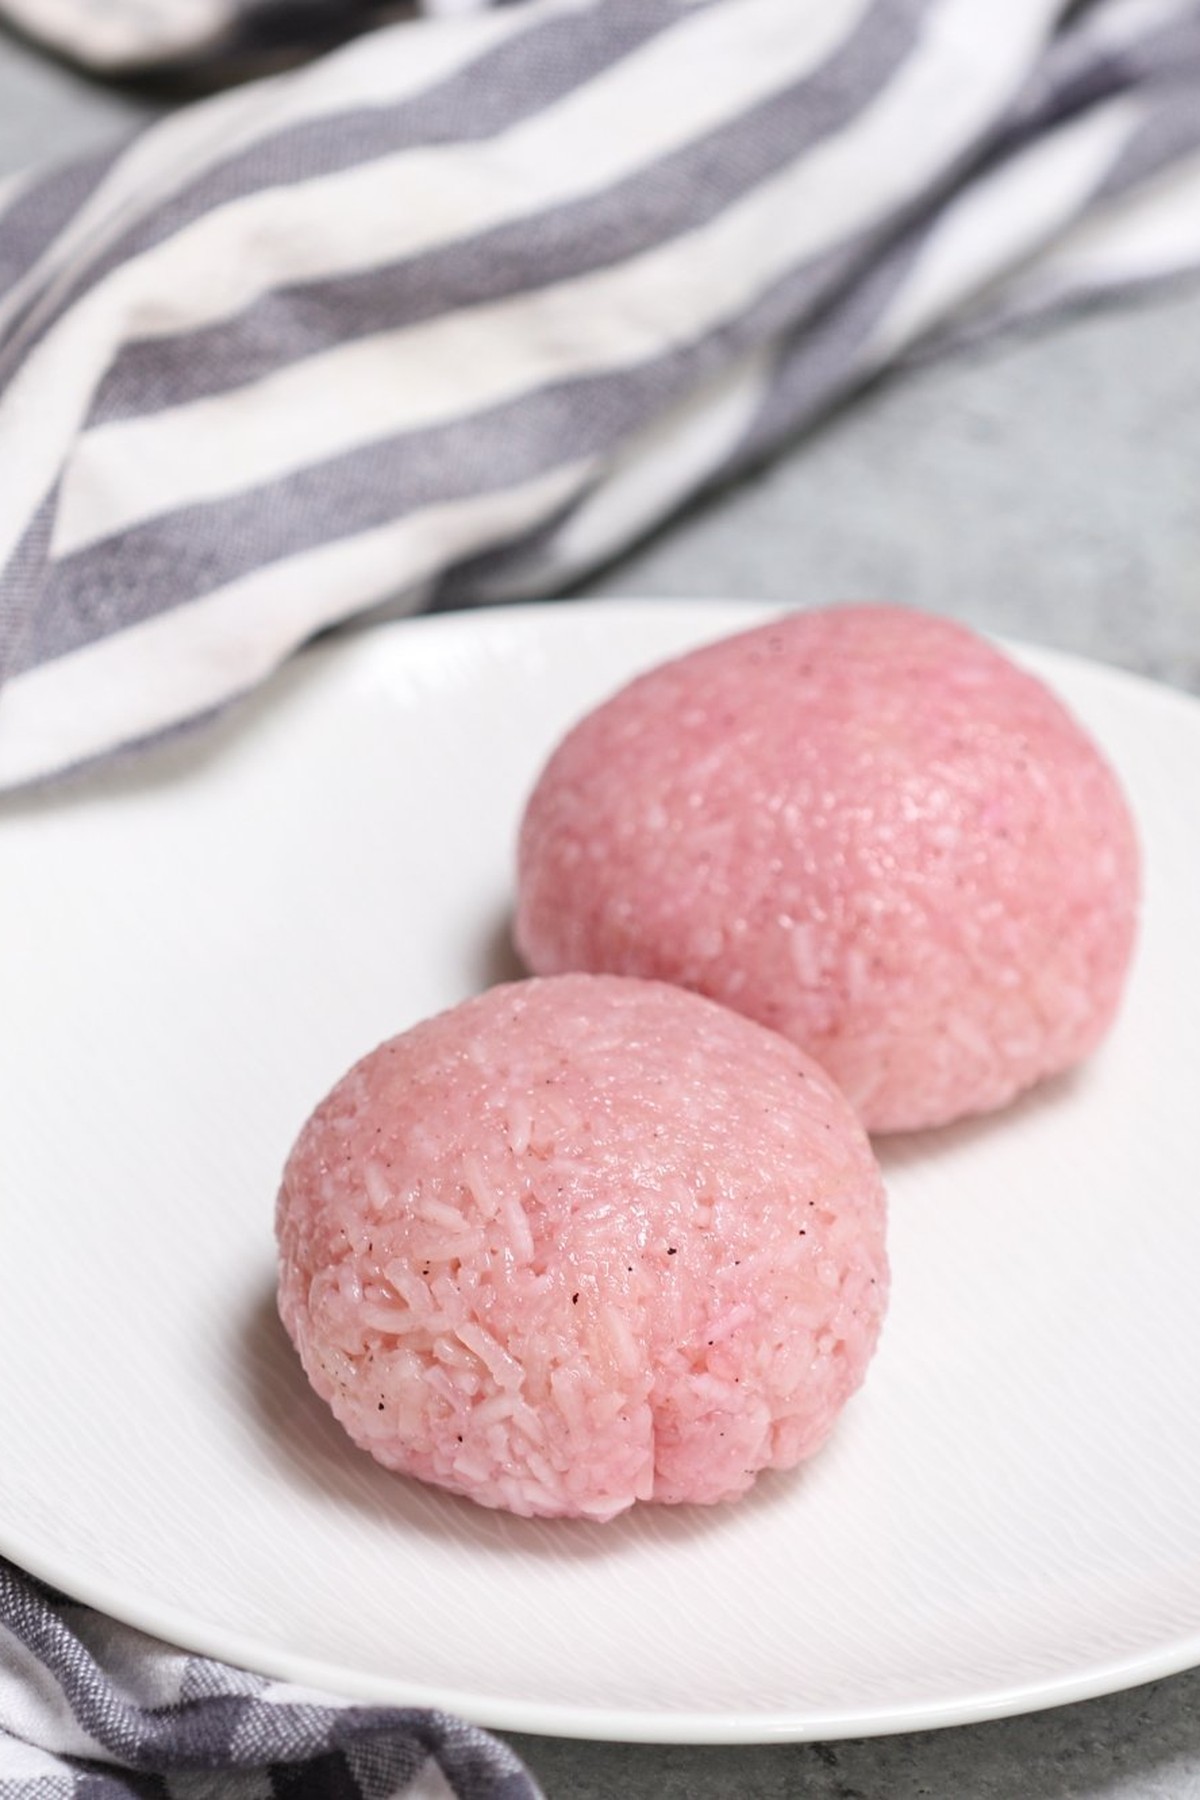
Sakuramochi is one of my favorite Japanese desserts. It’s made with sweet rice (or glutinous rice) with anko red bean paste filling, and then covered with a pickled sakura leaf. It may seem intimidating to make this delicate treat, but it’s quite easy to prepare with a few simple tips.
There are different styles of sakura mochi in different regions of Japan. Kanto-style sakura mochi uses shiratamako rice flour to make the mochi cake, and Kansai-style uses domyojiko, which is coarsely broken glutinous rice.
My version is more like Kansai-style, but instead of domyojiko, I used the regular glutinous rice that’s widely available. It’s also extremely easy to make and very delicious.
Ingredients You’ll Need and Where to Buy Them
- Glutinous Rice – Also called sticky rice or sweet rice. You can find it in most Asian grocery stores or order online from Amazon. Traditional sakura mochi uses Japanese short-grain glutinous rice, but you can also use the Thai long-grain variety. Both are delicious but the texture is quite different.
- Sugar – I used the regular granulated sugar for this recipe. You can replace it with stevia for a sugar-free Keto diet.
- Red Food Coloring – It helps to turn your sweet rice cake into a nice pink color. I used dragonfruit powder, and some people use beetroot juice for the natural pink color in this recipe, but feel free to use any red food coloring.
- Red Bean Paste – You can find it at local Asian grocery stores or order it online from Amazon. Alternatively, you can make it at home (see recipe notes for how to make homemade red bean paste).
- Pickled Sakura Leaves – These are the salty pickled leaves mostly for decoration purposes. They also add slightly salty flavor and cherry blossom aroma to the mochi. You can order them online, or skip this ingredient if you prefer.
How to Make Sakura Mochi
1. Soak the glutinous rice with water overnight (or at least 1 hour if you’re in a hurry).
2. In the meantime, soak pickled sakura leaves for 15-30 minutes to remove the salt.
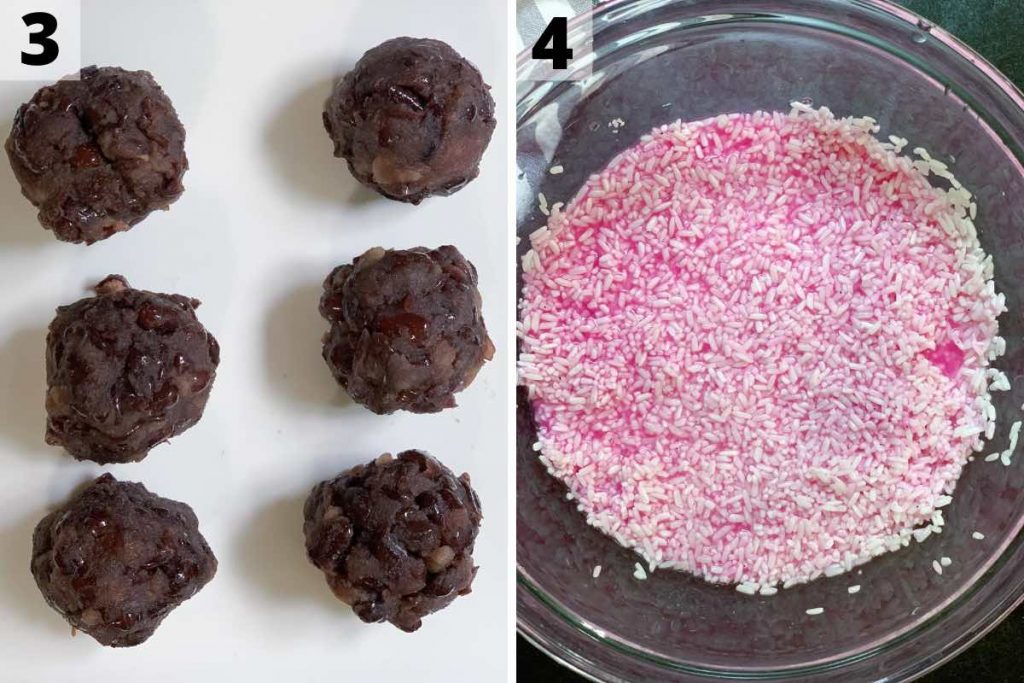
3. Roll red bean paste into small balls and set aside.
4. Drain the rice, and add water and food coloring. Mix well.
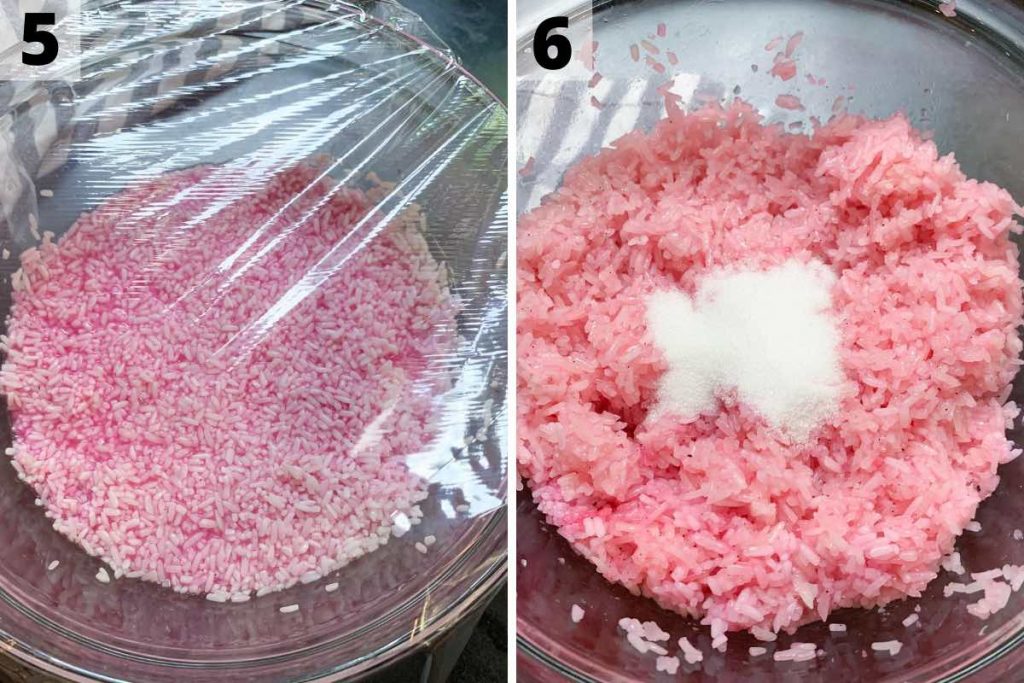
5. Transfer the mixture to a microwave-safe bowl. Cover with plastic wrap and microwave for 6 minutes. (Mix once after 3 minutes).
6. Remove the plastic wrap and add sugar. Mix well. (Optional) If you prefer the extra sticky texture, you can pound the rice until it’s partly broken and very sticky.
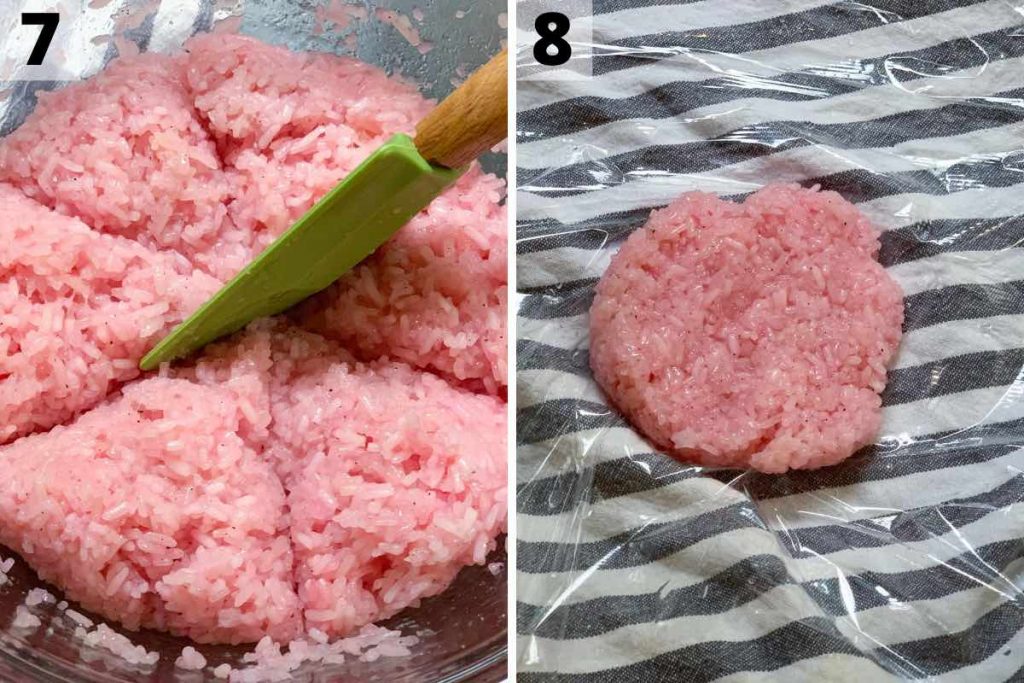
7. Divide the rice into 6 equal portions.
8. Place a piece of plastic wrap on the working surface, and add 1 portion of the rice on top. Spread it out into a round thin layer.
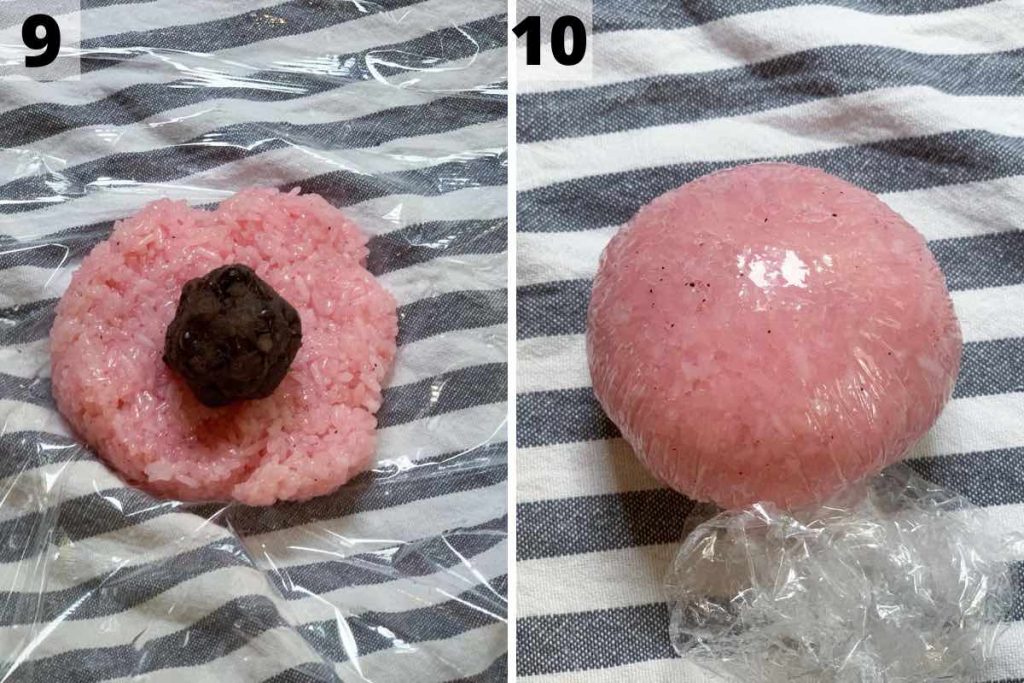
9. Place a red bean paste ball in the center of the sticky rice.
10. Roll the rice over to cover the red bean paste completely. Tighten the plastic wrap and make it into an oval shape.
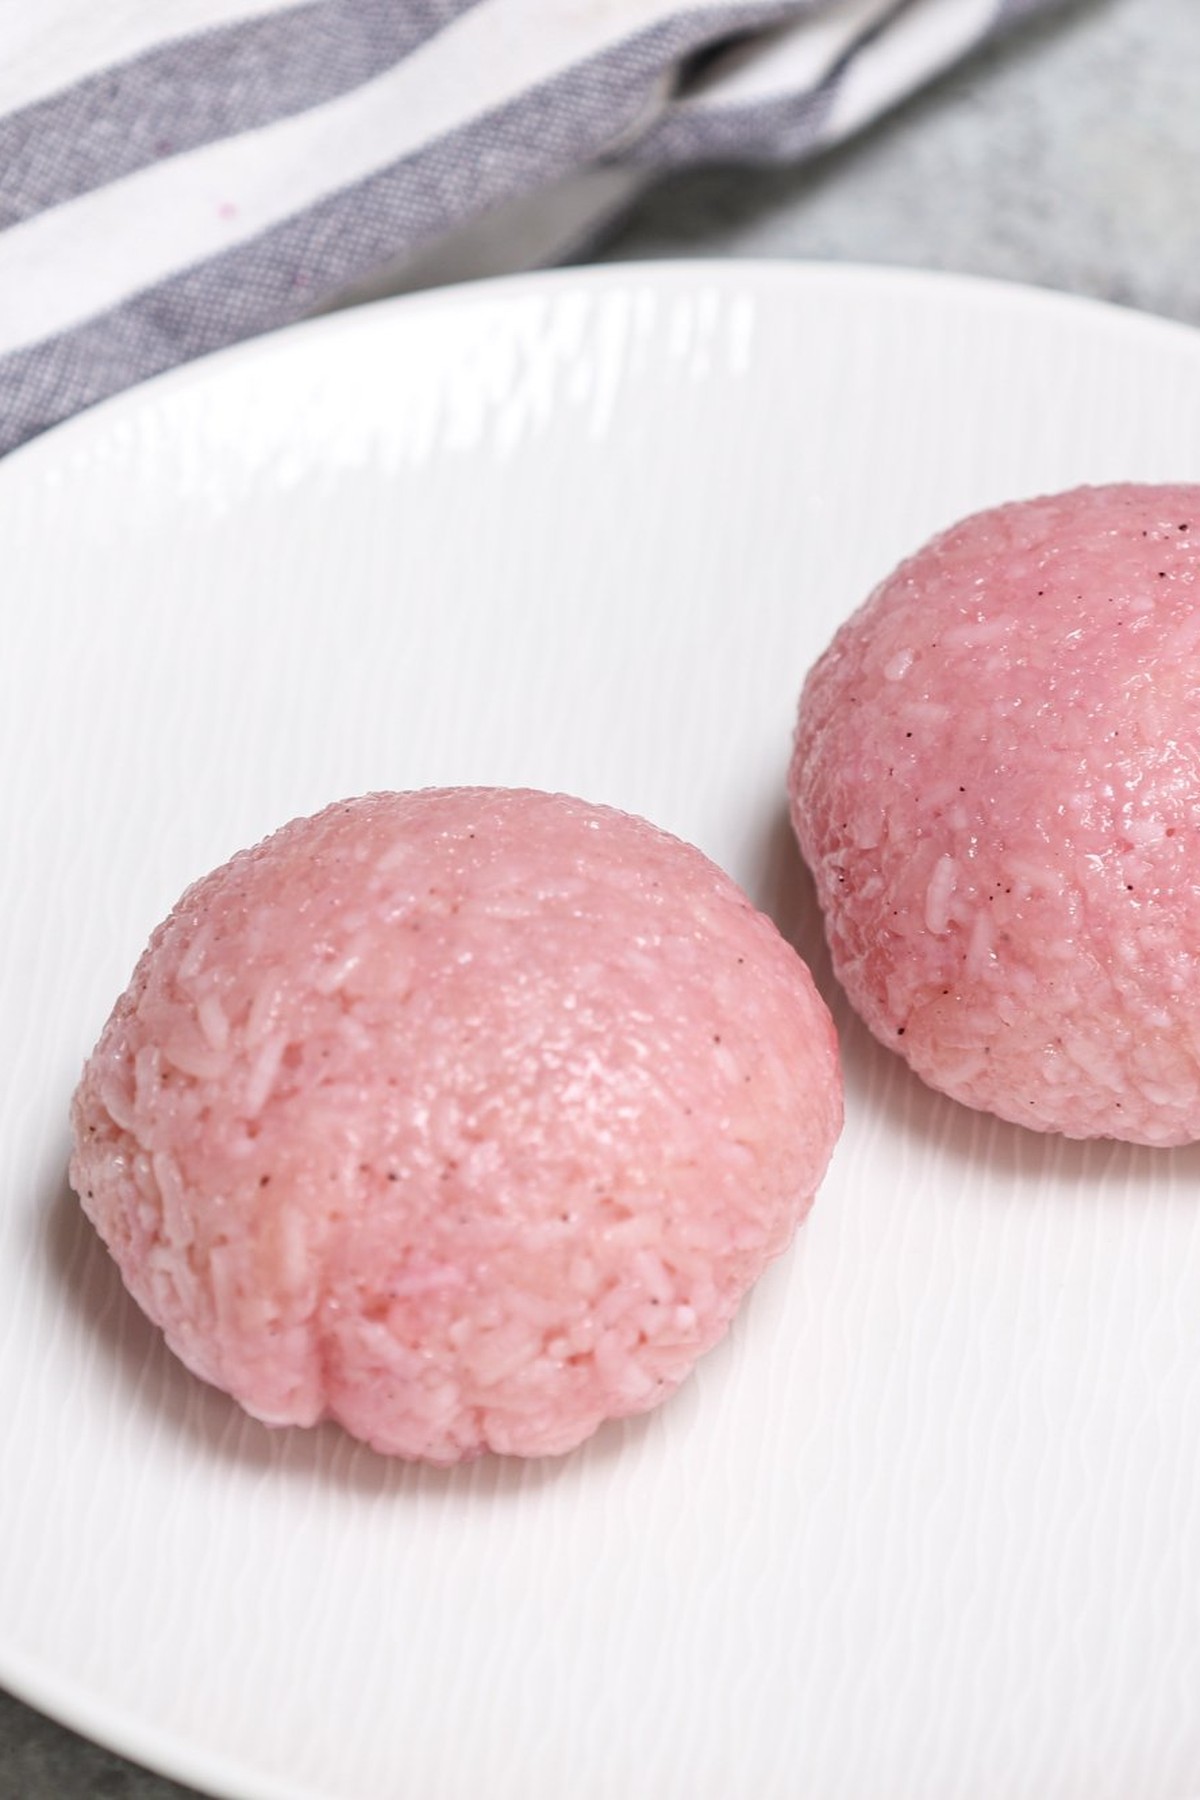
11. Remove the plastic wrap and cover the mochi ball with a sakura leaf. Then repeat for the rest.
Tips and Tricks
- Plan ahead of time. It’s best to soak the sweet rice overnight, or at least 1 hour if you’re in a rush.
- Add the food coloring gradually until it reaches the color you like.
- As the the cooked rice is very sticky, you’ll need to use plastic wrap instead of your hand to wrap the red bean paste.
Frequently Asked Questions
How to Store Sakura Mochi and How Long Do They Keep?
Store them in an airtight container in the refrigerator and they can last for 3 days. These cherry blossom mochi balls taste the best on the day they’re made.
Do You Eat the Leaf on Sakura Mochi?
The pickled sakura leaves are edible with a scent of cherry blossom, and you can eat the leaves together with the mochi. Personally I like to remove the leaf, and there’s still some aroma left on the rice.
Can I Make Sakura Mochi Ice Cream with This Recipe?
No, the mochi rice cake in this recipe cannot hold the ice cream properly. If you’d like to make mochi ice cream, you need to use Mochiko or Shiratamako flour, and follow the instruction on this post.
What is the History of Sakura Mochi?
Sakura mochi (桜餅) was invented in the early 1700s by a guard at a temple. Because it has a nice pink color resembles pink cherry blossom, this Japanese sweet (wagashi) is traditionally eaten during the spring season, especailly on Girl’s Day, known as Hinamatsuri (March 3).
What Does Sakura Mochi Taste Like?
Sakura mochi is sticky, sweet, and chewy with a nice cherry blossom aroma. If you eat it with the leaf, it will have a slightly salty taste. It’s absolutely delicious!
Easy Sakura Mochi Recipe
Ingredients
- 3/4 cup glutinous rice, sweet rice
- 3/4 cup water
- red food coloring, I used dragonfruit powder, but you can use any red food coloring
- 3/4 tablespoon sugar
- 3 tablespoons red bean paste*, see how to make homemade red bean paste in the recipe note
- 6 pickled sakura leaves, (optional)
Instructions
- Soak the glutinous rice with water overnight (or at least 1 hour if you’re in a hurry).
- In the meantime, soak pickled sakura leaves for 15-30 minutes to remove the salt.
- Roll red bean paste into 6 small balls and set aside.
- Drain the rice, and add water and food coloring. Mix well.
- Transfer the mixture to a microwave-safe bowl. Cover with plastic wrap and microwave for 6 minutes. (Mix once after 3 minutes).
- Remove the plastic wrap and add sugar. Mix well.
- (Optional) If you prefer the extra sticky texture, you can pound the rice until it’s partly broken and very sticky.
- Divide the rice into 6 equal portions.
- Place a piece of plastic wrap on the working surface, and add 1 portion of the rice on top. Spread it out into a round thin layer.
- Place a red bean paste ball in the center of the sticky rice.
- Roll the rice over to cover the red bean paste completely.
- Tighten the plastic wrap and make it into an oval shape.
- Remove the plastic wrap and cover the mochi ball with a sakura leaf. Then repeat for the rest.
Notes
- Plan ahead of time. It’s best to soak the sweet rice overnight, or at least 1 hour if you’re in a rush.
- Add the food coloring gradually until it reaches the color you like.
- To make homemade red bean paste, you’ll need:
- 1/3 cup red beans
- 1/3 cup sugar
- water
Nutrition
Nutrition information provided is an estimate only and will vary based on ingredient brands and cooking methods used.
This post may contain affiliate links. Please read my disclosure policy.